
Tips Feature
Small World – 8 Tips for Creative Miniature Photography
with Simon Stuart
Funny, creative, inspirational – the genre of Miniature Photography is all of these things. Simon Stuart shows you how to try it yourself

'Servicing my Nikon D90', Nikon D7200, 18-105mm, 1/10sec at f/25, ISO 100
Taking photographs with miniature figures and objects isn’t exactly a new idea. The moment a model railway enthusiast lay their hands upon their first camera, you can be sure they will have pointed its lens toward their beloved model rail, and fired that shutter. Today’s photographic artists, however, strive to capture something more than life. Whether it’s a surrealist processing of a landscape or an entirely abstract composition, photographers always try to inject a hint of their uniqueness into everything they capture. Miniature Photography is simply one form of photographic artistry to mix the real with the surreal.
Rather than simply building a scale model diorama portraying some kind of scene, the idea is to integrate true-scale, real-world objects, foods or ‘entities’ into the miniature world. In essence, real-world ‘entities’ should be a subtle nod to the miniature scale, while representing something organic to the miniature scene you’re composing. This can be as simple as using a strip of staples to represent an escalator, or some broccoli to represent trees.
If you’re imaginative, however, you will see miniature potential in a truly inexhaustible variety of real-world entities. For myself, a previously-mundane weekly visit to the supermarket has become an inspirational adventure; where ordinary household items and foods are now child’s playgrounds, or ramps and jumps for a miniature skatepark. The limit truly is your own imagination.

'Data Maintenance', Nikon D7200, 18-105mm, 1/13sec at f/32, ISO 100

1. Put some thought into planning your miniature photography scenes
The first stage of my miniature photography comes simply in the form of inspiration. This involves me coming up with ideas for scenes where I can incorporate real-scale entities into scenes with miniature figures. Once I have the idea, I can make a note of it on my phone and start the necessary preparations.
I then need to decide what models I need to compose the scene in question. There are a great many models out there in all shapes, sizes and poses, so there’s something for every idea you can imagine. If there are any models I need that I don't already have, I’m able to easily buy them from various online stores. One of particular note and one I can personally recommend is a company called Howard Scenic Supplies; a company based in Essex in the UK that specialises in model railway scenery and – more importantly – figures. You can find pretty much anything there, so your imagination when it comes to these scenes can afford to be fairly limitless.

'Escalator To Hell', Nikon D7200, 18-105mm, 1/20sec at f/29, ISO 100
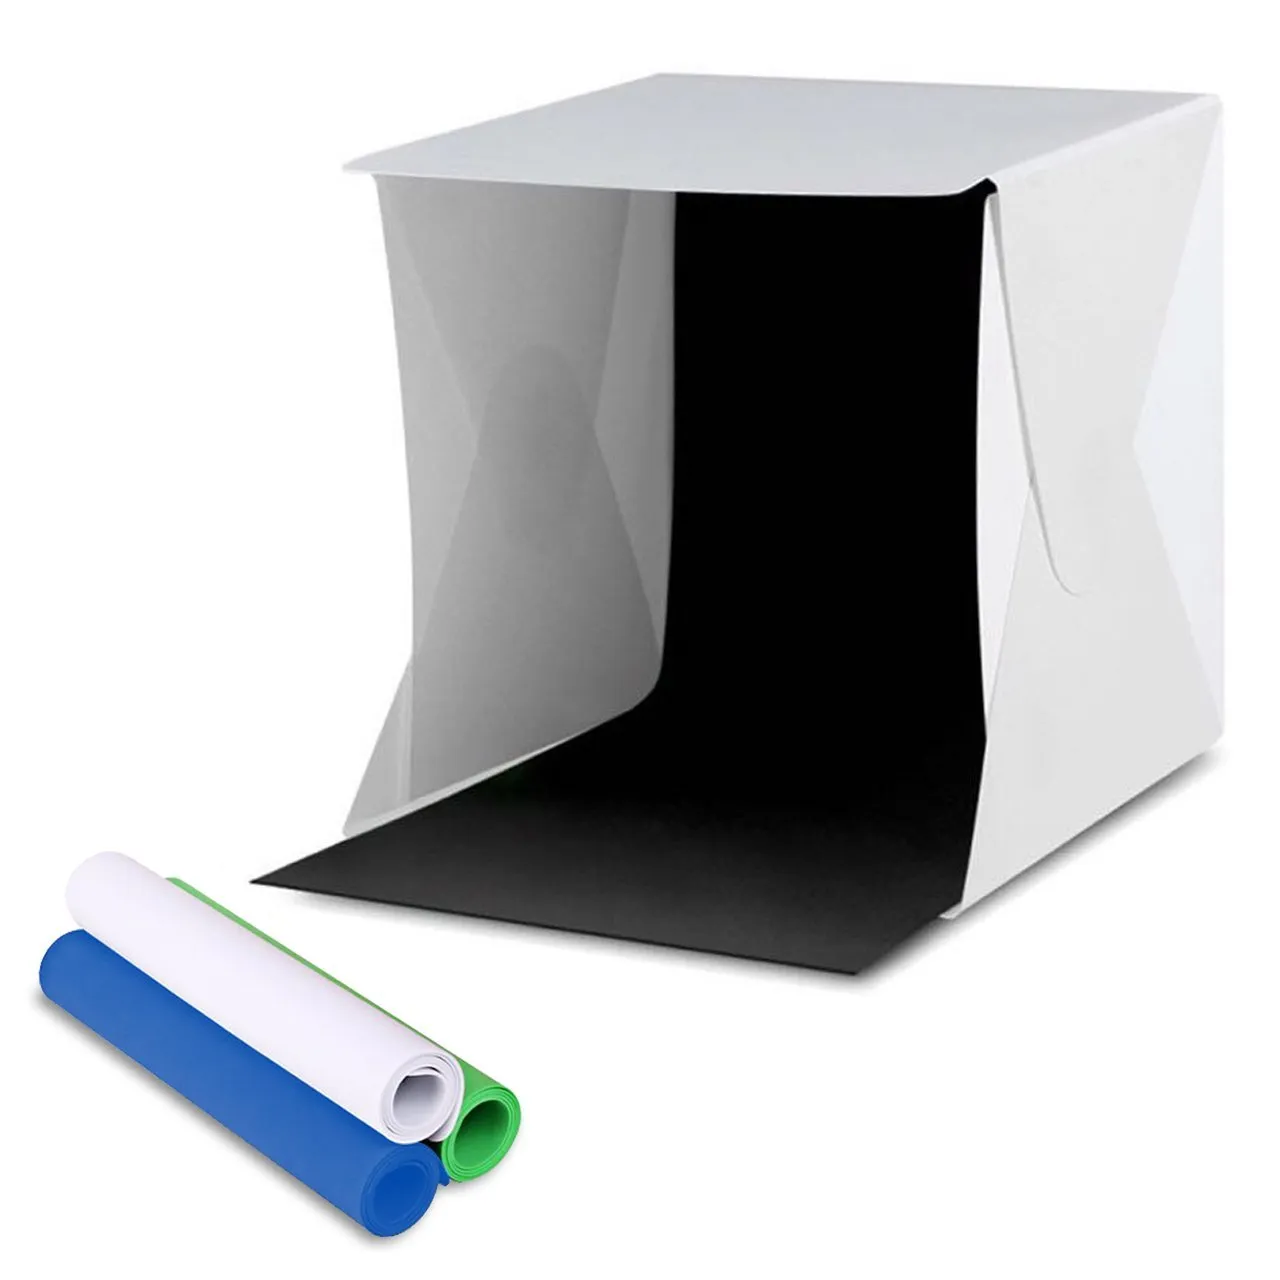
2. Invest in a portable Studio Box
Once I’ve successfully gathered all of my models and props together, I can then move on to setting up my inexpensive (but infinitely useful) Studio Box. There are plenty of these available online for pretty reasonable prices, so you won’t be stuck for choice if you want to invest in one.
My Studio Box consists of a tubular frame forming a cube shape, an outer cover with a fully-reflective interior, a backdrop made from flexible plastic – usually white, but I also have black, grey, and orange, so I use whatever best fits the scene – and two 5500K calibrated LED strip lights that magnetically mount to the tubular frame.
I then lay out the scene carefully, using Pritt Stick to temporarily stick each miniature figure in place. You only need a small amount of glue, and it is never visible in the shot. Some figures can be a little more fiddly than others, so patience is definitely a virtue when composing your miniature scene. I do recommend a pair of tweezers for your miniature kit, as you’re far more likely to knock over figures and entities you’ve already placed when reaching in with your hand than with a pair of tweezers.
3. Light your miniature photography with a Speedflight flash
The next stage is to arrange the lighting. For my work, I usually place a single Speedflash on a remote trigger and stand this off to either the front-left or front-right corner of the Studio Box. The Speedlight will be out of frame but aligned to provide frontal lighting, as well as increase the chroma key from the backdrop (particularly useful when using a white backdrop).

4. Give yourself options when shooting
Once the scene is composed and I’m happy with the lighting, I mount my camera on a tripod. This is sometimes a floor-standing tripod, and sometimes a little table-top tripod depending on where I'm set up and what space is available to me. When I’m shooting, I tend to take shots from various angles. That leaves me free to look through the shots later and decide which one I like the best.

'Fishing on the River Mackerel', Nikon D7200, 18-105mm, 1/50sec at f/25, ISO 100
5. Make sure you put some thought into the right camera settings
When I’m shooting – and I always shoot raw files, by the way – I tend to use a really small aperture. I’d personally recommend using the highest f-stop your lens supports. For me this is typically between f/22 and f/36, depending on the lens and focal length. This is to provide maximal focus from front to back, but of course, if you desire some visible depth of field in your shot, as some photographers of miniatures tend to do, you can use a wider aperture to suit your needs.
One thing I will suggest is that you invest in a remote trigger, which will help to reduce any camera wobble and blurred shots. As you’re working with quite small subjects, just the slightest blur can end up ruining an otherwise lovely image.

'Malteser Mining', Nikon D7200, 18-105mm, 1/4sec at f/29, ISO 100
6. Make sure you bracket your shots
With these static images, I always shoot brackets of three shots, one of -2ev, one at 0ev, and one at +2ev (two-stops underexposed, level exposure, two-stops overexposed). Doing this gives me much more flexibility in post-production. I like to composite HDR shots for the final images. This simple process reveals so much more detail than a single shot at 0ev would, and really brings the scene to life.
When shooting a bracket for HDR, you’re given a massive range of adjustment for exposure, highlights, and shadows. This enables you to increase visible detail in both highlights (by lowering them) and shadows (by raising them)
Once all the shots are done and ready to go, I import the raw files into Adobe Lightroom, and, if I'm shooting a trio of bracketed images as I mentioned above, I can then composite the three exposures into a single image.

'Supreme Fidelity', Nikon D7200, 18-105mm, 1/20sec at f/36, ISO 100
7. Take your time in post-processing to remove all blemishes and dust
The next stage involves me spending a great deal of time working on Spot Removal. I can’t emphasise enough what a crucial stage this is. Even when a backdrop looks immaculate to the naked eye, you must remember that the camera sees all. No matter how careful you’ve been, and how clean you’ve kept your lens and Studio Box, there are always spots of dust in miniature photos. Take your time removing every single last one.

'PS4 Controller Skatepark', Nikon D7200, 18-105mm, 4/5sec at f/32, ISO 100
8. Adjust the levels in Photoshop
Next comes the level adjustments, which are made as you would with any photograph. Personally, I try to wash out the backdrop entirely (If it's a white or black backdrop), I go with +4ev on an adjustment brush; if it's a black backdrop, I go with -4ev on an adjustment brush.
Once I'm happy with the edit, the image is rendered, and (for public use) I apply my standard watermark in Photoshop. And that’s it. The final image is complete and you’ve successfully entered into the world of Miniature Photography!

'Modern Street Artists', Nikon D7200, 18-105mm, 1/6sec at f/32, ISO 2000

