Tips Feature
The Beginner’s Guide to the Art of Light Painting
with Mathew Browne, Dylan Arnold and Nikolay Trebukhin
Three photographers share their tips and techniques for achieving stunning light painting photography

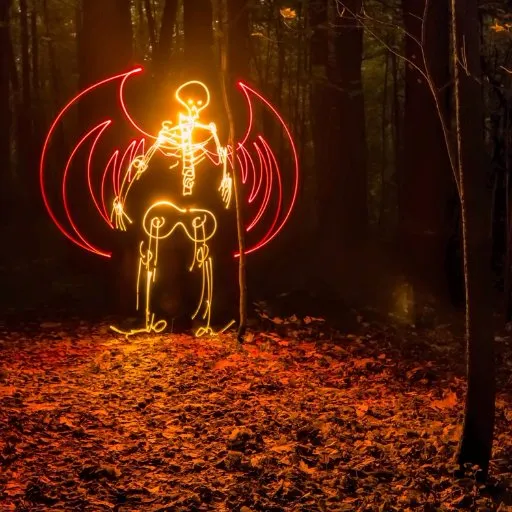
'The Matrix' by Dylan Arnold, Canon EOS 6D, 17-40mm, 30secs at f/4, ISO 200
1. Embrace the spontaneity and unpredictability of light painting
Light painting is a genre of photography that has been growing in stature for several years. What was once the reserve of a small band of night photographers is now a style of image-making saturated with artists looking to make their mark through stunning and vivid streaks of light set against pitch-black environments. Mathew Browne, Dylan Arnold and Nikolay Trebukhin are three photographers who have spent many a night out in the field experimenting with this endlessly creative craft. But if you’re still a little unsure as to what light painting actually is, they’re on hand to shed a little light on the matter.
‘Quite simply, light painting is a technique used in long exposure photography where you can use artificial light sources to illuminate a scene, or to create new elements within the image,’ says Mathew. ‘First and foremost, it’s visually spectacular. It’s unlike anything one could see with the naked eye. Your only limitation really is your imagination.
‘Secondly, it is an interesting technical challenge. Without the right equipment, sufficient darkness, good technique and appropriate timing, the photograph fails. For every light painting photo that reaches my portfolio, there must be a hundred failed attempts to get it right. My strike rate is improving, of course, but there can be an element of luck to nailing the perfect shot.’

'Pixelstick Wedding I' by Mathew Browne, Nikon D810, 35mm, 13secs at f/8, ISO 100
For Dylan, light painting allows him to create art and sculpt and form light patterns, almost like an artist using marble to create an entirely new form, except in this case Dylan is using light and dark.
‘I like the spontaneity and unpredictability of it,’ says Dylan. ‘You can’t “see” the shot you’re going to create until the shutter has closed. You can never be 100% certain how the image will look no matter how meticulously you set it up. It’s very rewarding seeing a concept in your mind’s eye, planning it and bringing it to fruition.’
It’s also worth noting that, as Nikolay points out, light painting is one of those arts that pretty much guarantees you’ll end up making new friends through the diverse contacts you’ll make along the way. That’s why it’s always worth visiting web forums or even getting in contact with photographers through Photocrowd to get some ideas, tips and advice.
‘It’s very pleasant to feel that you belong to this community of artists,’ says Nikolay. ‘In addition, I can develop tools, experiment with them and then share the knowledge. There are no restrictions.’
2. Make sure you have the right equipment to help you achieve your light painting images
Camera
The first thing to do when deciding to enter the esoteric world light painting is think about what equipment will help you create your masterpieces out in the field. It’s no good travelling out to an abandoned factory in the middle of nowhere only to realise you’re insufficiently served by your equipment.
There are many cameras out there with excellent low-light capabilities. One of particular note is the Sony a7s II, a camera that was lauded for its ability to handle extremely dark conditions. Mathew has found that the Nikon D810 is more than capable of delivering the results he needs, whereas Dylan has settled on the Canon EOS 6D.
‘For me, the most important thing is the camera,’ says Dylan. ‘The full-frame sensor’s superior noise handling capabilities in the Canon EOS 6D definitely helps when you need to crank the ISO up for low-light situations.’ However, if you’re an Olympus user looking to get into light painting then you have a rather handy tool at your disposal.
‘At the moment, I'm using the Olympus OM-D E-M1 with the Live Composite mode,’ says Nikolay. ‘In Live Composite mode, the camera shoots a series of images continuously with the same exposure time. The camera then combines all the images together into a single composite. Exposures can be up to three hours, so the mode is also perfect if you’re looking to produce star trails.’

'Deadvlei at Night' by Trevor Cole, Nikon D800, 14-24mm, 27secs at f/2.8, ISO 3200

Lens
Mathew points out that your choice of lens will be largely dictated by what you intend to shoot and in what kind of environment you plan to visit. Where Dylan tends to rely on a couple of wide-angle lenses, specifically the Canon EOS 16-35mm f/4L and Samyang 14mm f/2.8, Mathew has his own preferences, both of which he uses extensively in his night work.
‘The first is a Laowa 12mm f/2.8,’ says Mathew. ‘This is an ultra-wide lens with nearly zero distortion. This works best for interior architectural shots. It’s a manual focus lens, but infinity at the end of the focus ring really means infinity, so it’s easy to focus in pitch black darkness
‘Second is the Sigma 14mm f/1.4. This is an essential lens if you’re looking to include a little astrophotography in your images as some light painting practitioners tend to do. With this one can combine incredible detail from a starry sky with a foreground interest too.’

'Light in the Kitchen' by Cisco, Canon EOS 5D Mark II, 17-40mm, 71secs at f/14, ISO 100
Tripod
Your next consideration should be which tripod you’re going to take on your travels. The sturdier your tripod, the better. As you’ll be out working in the open and working with long exposures you’re likely to be faced with winds and uneven ground. Dylan recommends the Manfrotto 055 with a 3-way head, or a Vanguard Alta-Pro 283CT with a Vanguard ball head. In Mathew’s case, he relies on his trusty Benro TGP17A tripod.

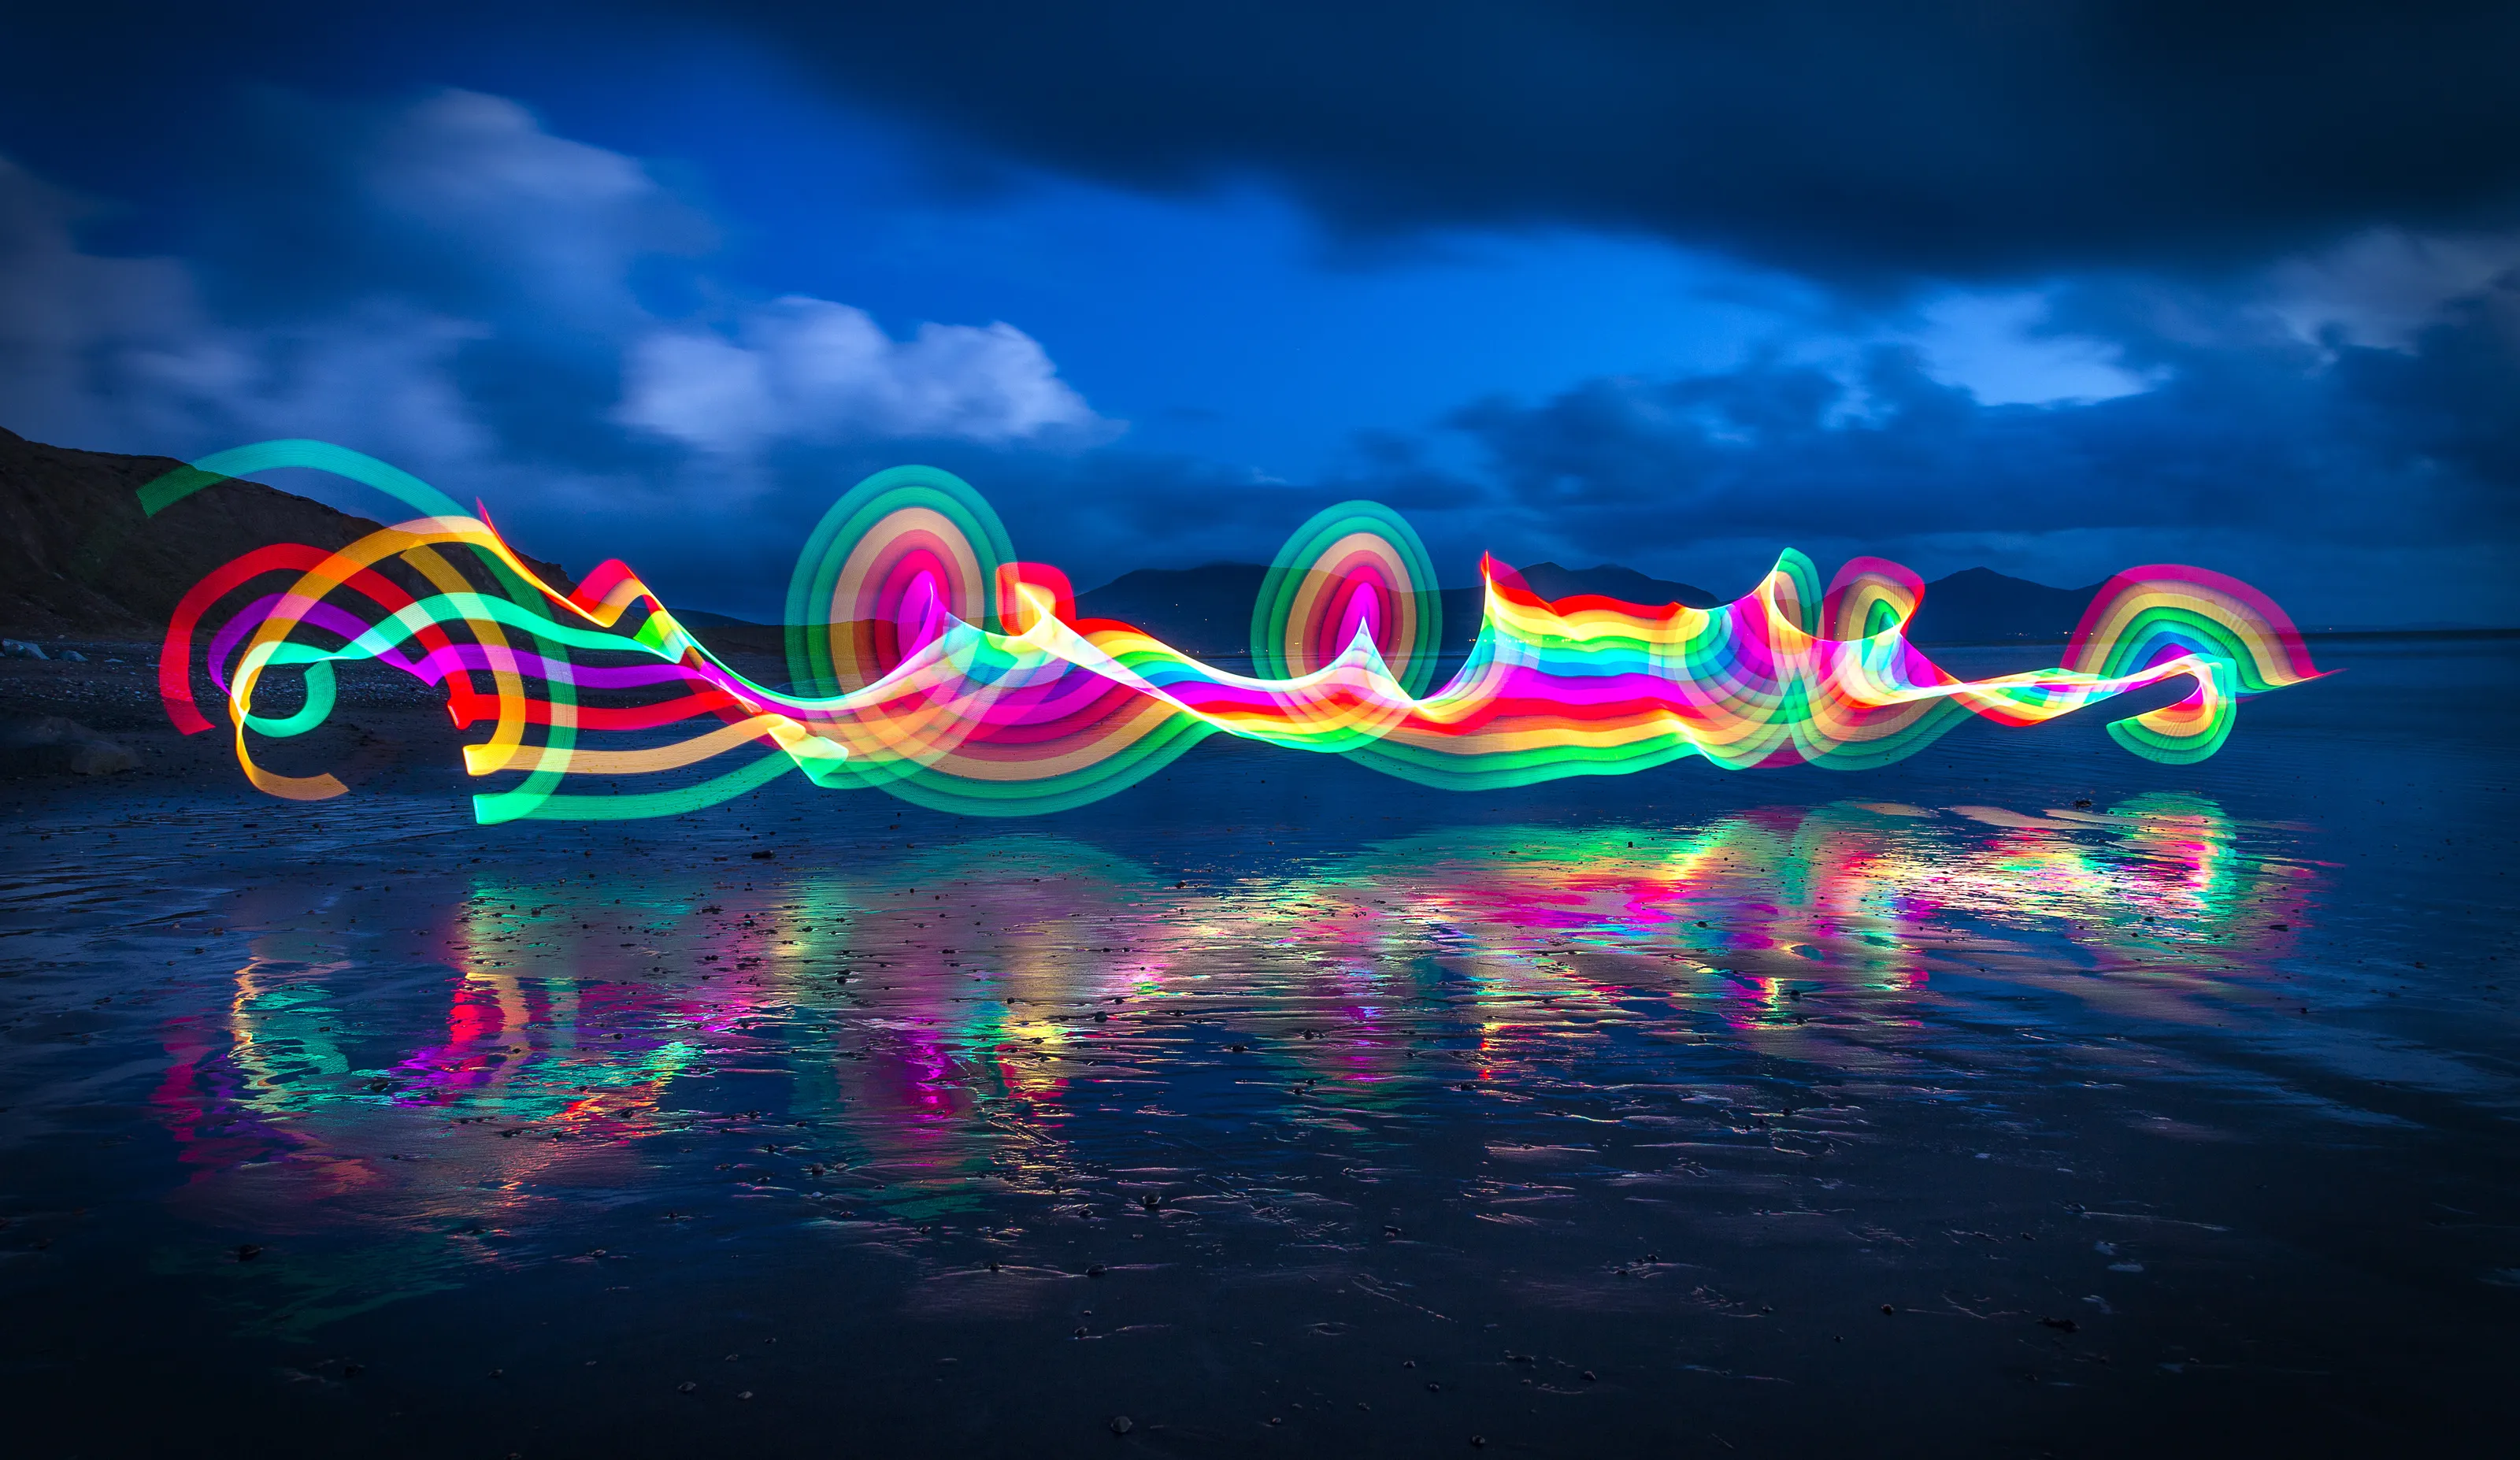
'Cheerful Forest' by Nikolay Trebukhin, Canon EOS M, 18mm, 322secs at f/6.3, ISO 100
Wireless shutter release
All three photographers agree that one of the most crucial bits of kit a budding light painter can have in their arsenal is either a wireless shutter release or remote. There are a few reasons for this. Primary among them is that as you’re working with long exposures, the last thing you want is to introduce camera shake into the equation due to your pressing the shutter. Another reason is that, as many light painters tend to work alone, they’re the ones creating the light patterns in their images. That means they have to be in front of the camera when the shutter goes off. Just the simple device of a shutter release or remote removes this unnecessary headache and frees the photographer up to do their thing.
‘The Canon 6D is wi-fi enabled and works well with the proprietary phone app,’ says Dylan. ‘But I prefer to use a dedicated trigger as it has a further range than my phone, is smaller to handle and less expensive to replace should I drop it.’

'Spectrum' by Dylan Arnold, Canon EOS 6D, 24-105mm, 20secs at f/11, ISO 100
Other items
As well as a torch (which we’ll come on to talk about when discussing focus) Mathew adds that it’s always worth carrying around spares of pretty much anything can have spares of. In Mathew’s case, this generally consists of spare SD cards (and this should be a necessity for all genres of photography, as well you know!) and copious amounts of AA batteries, which will get eaten up by his torch and, most importantly, his Pixelstick, the main tool he uses for his light painting images.

'Playing at the Park' by Andy Cole, Canon EOS 5D Mark II, 28mm, 263secs at f/8, ISO 400
3. Don’t limit your options when it comes to the kinds of tools you can use to create light painting photography
There are plenty of tools out there to help you on your way to creating successful light painting images. Just a quick glance online will reveal several specialist tools, such as the Westcott Ice Light 2 and the Lowel GL-1 Power LED. One of the most popular, however, is the Pixelstick.
‘The Pixelstick is an incredible light painting tool,’ says Mathew. ‘It lets you output bitmaps (the kind of image the Pixelstick will paint in your image) on a 200-pixel resolution display. However, I should say it isn’t the cheapest option, and it eats eight AA batteries all at once (and exhausts them rapidly, too). But the results really are unparalleled. With the Pixelstick you can paint your own images into a scene. For example, this is just a simple repeating square pattern but yields a very pleasing result.’

'VW Camper Lightpainting IV' by Mathew Browne, Nikon D810, 16-35mm, 20secs at f/8, ISO 100
Dylan agrees about the capabilities of the Pixelstick, though he’s also keen to point out that you don’t always need to restrict yourself to specialist equipment. His kit bag is packed full of stuff that can create unique and interesting ideas:
• headtorch
• 900 lumen strobe/floodlight
• flashgun
• wire wool, including a kitchen whisk to stuff wire wool into for spinning and paracord for spinning the whisk
• windproof lighter
• LED wires
• LED lights
• home-made LED sticks
• wheels with attached LEDs
• glowsticks
• laser pens

Image by Kelly Deans, exposure unknown
4. If you can, travel with all of your light-painting tools
While Dylan's list looks like a lot of stuff to carry around, Nikolay says that it’s worth the weight.
‘Even if I don’t intend to use them, I’ll usually take all of my tools with me,’ says Nikolay. ‘You never know what will come into your head when you’re shooting at the site. Plans often change so having all your tools to hand is incredibly helpful.’ As Nikolay says, it can sometimes be the case that you’ll have an idea for an image using one set of tools only to find it isn’t working for you. Having other options means you can change tack and use something different. You may be surprised to find your images works with the least expected light source.

'Vespertine' by Seanen Middleton, Nikon D600, 35mm, 1/3secs at f/2.5, ISO 50
5. Always shoot in manual mode
Shooting in manual mode is a must. This will give you absolute control over your camera’s exposure, which is crucial when it comes to working with light painting. There will undoubtedly be a great deal of trial and error involved and it’s difficult to give solid advice when it comes to this. The best advice that Mathew can offer is to experiment with long shutter speeds of 10-30secs and select an appropriate aperture to match this.
‘In total darkness, this will be the lowest possible,’ says Mathew. ‘But during the blue hour or with other artificial light illuminating the scene, I may stop down to around f/8.’
‘The camera settings are entirely dependent on the subject, location and conditions,’ adds Dylan. ‘I usually focus on the subject and choose the lowest aperture my lens will allow. This maximises the light coming through the lens so I can keep my ISO as low as possible. I rarely shoot longer than 30sec exposures for light painting. I often stack the images as layers in Photoshop and blend them to enhance the lighting in the finished image.’

'Fallen Angel' by Dylan Arnold, Canon EOS 6D, 17-40mm, 10secs at f/6.3, ISO 400
‘The speed of the aperture and shutter speed depends on the lighting,’ says Nikolay. ‘In full darkness, the aperture opens as much as possible, probably f/2.8 or f/1.4 but that depends on the capabilities of your lens. The shutter speed also depends on the ambient light. In the dark, without external light sources, you can draw five and ten minutes or more. Basically, without the use of a wireless console, the cameras are limited to an exposure time of 30 to 60secs. But that’s plenty of time for what you need.
‘As an aside, I’d also advise you to turn off the noise reduction mode, as it increases the camera’s processing time of each frame. That is, if you spent three minutes on one image, then the camera will take longer to process the image, meaning you’re losing time.’

'Ommm...' by Nikolay Trebukhin, Canon EOS M, 22mm, 333secs at f/5.6, ISO 100
6. Always shoot your light painting images in raw
It should go without saying, but always make sure you’re shooting raw files.
‘You have to shoot in raw to achieve the best quality images and editing flexibility,’ says Dylan. ‘Raw files can be pushed much harder in post-production and offer better results because you’re working with the camera’s raw, uncompressed files. The difference is noticeable between the raw and jpeg when cropping, lifting shadow detail, altering colour temperature, and so on.’
‘Raw is absolutely essential,’ agrees Mathew. ‘Not just for this genre, but all photography. You can pull out so many more details out of the shadows and highlights in post-processing that you ever could using jpeg.’

Image by Andy Cole, Canon EOS 5D Mark II, 45mm, 114secs at f/5.6, ISO 200
7. Use auto white balance
You would think there’s some special trick to white balance considering the various sources of light and colour on display when it comes shooting light paintings, but in fact it’s the one area of your camera you can let look after itself.
‘I usually have my white balance set to auto,’ says Dylan. ‘It’s sort of irrelevant if you’re shooting raw files because you can adjust the colour temperature any time in Adobe Camera Ra). If you’re shooting in jpeg, then the value is fixed and you can’t alter it afterwards. That’s another strong reason to make sure you’re always shooting raw files.’

'The Vortex' by Neil Moroney, Canon EOS 6D, 15-30mm, 25secs at f/2.8, ISO 1000
8. Use a torch to focus if you’re working in dark conditions
One of the things that can trouble those new to light painting is how to ensure that your images are in focus. In fact, this is one of the simplest things to master so long as you plan ahead. Both Mathew and Dylan have similar sentiments when it comes to this subject.
‘Even as a user of Canon cameras, I have to admit Sony shooters are laughing on this score,’ says Dylan. ‘The focus-peaking feature on their cameras is incredible, being able to accurately focus in near total darkness, making the whole process a lot quicker and easier. That said, my method is a bit more old-school. I use a high-powered headtorch to illuminate the foreground and the main subject, then manually focus using live-view. It’s a simple and easy process.’
If possible I arrive at a shoot at sunset, with ambient light still in the sky allowing me to compose a scene and focus automatically,’ says Mathew. ‘If it’s already dark, or I’m indoors, I’ll use my torch to illuminate the elements I want in focus, and just focus manually.’
Nikolay’s technique is similar, except he sometimes has the luxury of working with a model who can assist him.
‘If I'm shooting with a model, then I usually ask them to shine a flashlight on themselves, usually around their feet, then I manually focus,’ says Nikolay. ‘Alternatively, I’ll switch the lens to autofocus, get everything sharp and then switch back to manual focus. If there’s no model or assistant, I can put an object in place of where I’m are going to make the light painting. This can be a light or reflective object such as an emergency stop sign (if you are on a car). Another object could be a high stick with some white paper attached. Then I can shine a light on it and focus.’

'Rain of Fire' by Digital Wolf Photography, Nikon D3100, 18-55mm, 62secs at f/8, ISO 100
9. Make sure you pick an interesting location
There’s a strong temptation to rely on the interesting patterns you make with your lights to create an interesting image. However, a good image is also made by the location. The right location can really add something to your images and will keep your audience engaged.
‘One of the central lessons I had to learn was when I quickly realised that twirling lights in mundane locations was not going to make for very interesting images (even though I still thought they were pretty cool at the time),’ says Dylan. ‘Just like a landscape image, a good location, strong composition and effective lighting is vital to make the image work. If you can pick an interesting location then you’ve added a degree of narrative that will elevate your images above the crowd.’

'Sparky's Return' by Dylan Arnold, Canon EOS 6D, 17-40mm, 20secs at f/8, ISO 250
10. Make sure you underexpose your test shots by one stop
‘When I started light painting, I was already fairly experienced as a night photographer, so I was well acquainted with night focusing, ISO and correctly exposing in the dark,’ says Mathew. ‘However, when setting up my test shots I was correctly exposing without any light painting. That meant that when those additional lights were added I risked overexposing the image. Therefore, the biggest lesson for me was training myself to underexpose by at least one stop when setting up my test images.’

'Pixelstick Wedding II' by Mathew Browne, Nikon D810, 35mm, 13secs a f/8, ISO 100
11. Study the work of other light painters to get inspiration and identify techniques
Like any genre of photography, most of the work in your light painting images actually comes from seeking out the images that will give you a little push in the right direction. The light painting community s vast and many practitioners will be more than open about how they achieve their images. This is particularly helpful if you want to start exploring the techniques behind their images. With that in mind, Dylan, Mathew and Nikolay discuss the process behind their favourite images.
Dylan Arnold
‘My favourite light-painting image is Firestarter,’ says Dylan. ‘This was a huge leap from my previous attempts at light painting and marked a more thoughtful approach to the style. This image has a dark narrative, and an added dimension, compared to my previous light-painting images, which were much more basic.
‘The image was taken in an abandoned WW2 bomb storage facility in a disused quarry in north Wales. A friend agreed to model so he stood in the lift and held a small handtorch. Meanwhile, another friend spun wire wool behind the lift and I waved and draped blue LED wires around the model at the lift entrance.
‘In post-production, I used an amber filter to turn the blue LED wires a fiery colour and stacked a couple of layers of wire-wool spin images. I carried out colour and tonal adjustments, then added the flames as individual layers in the foreground, and inside and around the lift, using different blending modes.

'Firestarter' by Dylan Arnold, Canon EOS 6D, 17-40mm, 25secs at f/4, ISO 250
Mathew Browne
‘For obvious sentimental value, I’d have to pick this image of my wife when she was eight months pregnant,’ says Mathew. ‘Here she is standing outdoors at night, while I run past carrying a Pixelstick, which is outputting stripes that gradually change colour. Her form is silhouetted, and it’s an image I’m very pleased with, albeit a very personal one. This was one of the first photographs I took with the Pixelstick. I’d unboxed it not long before taking this series of pictures. In fact, my incentive to purchase the Pixelstick in the first place was precisely because I had an image like this in mind.

'Pregnant & Light Painting II', Nikon D810, 5secs, ISO 100
‘In terms of critical acclaim, my unimaginatively-titled VW Camper Lightpainting II is another favourite,’ Mathew continues. ‘The vehicle in question was a classic VW camper van that had been lovingly restored by my cousin. He and his father poured countless hours of work into it, but circumstances dictated that it was time for him to sell it. He asked me to photograph the van so he had something to remember it by.
‘The shoot took place on Llanllwni mountain in south Wales, in May 2017. The new buyer was picking up the van the next morning, so we only had one night to get it right. We were fortunate to have a spectacular sunset with mid-level clouds fringed in pink. I twirled the Pixelstick around the van, with the headlights and interior lights illuminated, which combined with the sunset unfolding behind to form an incredible, one-of-a-kind image.’

'VW Camper Lightpainting II', Nikon D810, 16-35mm, 3secs at f/16, ISO 64
Nikolay Trebukhin
‘While I have other favourite light painting images, this is one I remember especially as it was created with persistent work, sweat and dust,’ says Nikolay. ‘The idea to make a volcano arose when we arrived to shoot at a sand pit. The height of the sandy hill was about 5m. To implement this plan, we had to climb up and down the sand a lot. From the first take, it just didn’t work. I had to try again. Then in the middle of shooting, the battery ran out. So I had to do everything again. In total, I think I spent 30 minutes on this. It was sandy, dusty and I was drenched through with sweat. But I had great pleasure seeing the result.

'My Personal Volcano!' by Nikolay Trebukhin, Canon EOS M, 22mm, 527secs at f/5, ISO 200
Dylan’s Top Tips
• Whenever possible, try and scout out new locations in advance during daylight hours. It will be dark when you next return there, so note any potential hazards and issues.
• Location is critical for a stand-out image. Choose an interesting location or feature and think about how to get the best out of it in terms of lighting.
• Blue hour is the best time for outdoors light painting. The camera can still pick up detail in the sky and an expanse of blue is always more pleasing than a plain black, featureless sky.
• Carry a powerful torch, preferably with a strobing effect, to aid focusing and to paint fill light into a scene while minimising overexposed ‘hot spots’. Also, carry plenty of spare batteries for camera and light sources.
• Wrap up warm – you’ll be standing around a fair bit. It sounds obvious, but don’t wear flammable, or expensive gear if you’re spinning wire wool. The smell of burning Gore-Tex is enough to make a grown man weep.

Image by Peter Silver, Nikon D800, 28-70mm, 19/2secs at 8, ISO 100
Mathew's Top Tips
• Learn to focus in the dark. Whether it’s knowing the ‘sweet spot’ on your lens, or shining your torch into the darkness and focussing manually. Your photo is doomed to failure unless you nail the focus first.
• Time of day is important. Full dark is good, but the blue hour can also work. I always try to arrive at a shooting location before sunset to allow me sufficient time to find my composition with ambient light to guide me.
• Get a wireless shutter remote. If you’re shooting alone, it’s simply not practical to hit the shutter then find your way back in front of the camera to illuminate the scene. With a remote control, you can be in place – far away if need be – and be in perfect position as soon as the shutter opens.
• Invest in a good tripod. Your tripod needs to be rock solid, and light painting demands long exposures.
• Practice makes perfect. Though I consider myself fairly accomplished now, my first attempts at light painting were hit and miss. Experiment with focal lengths, shutter speeds and compositions. The best experience? Head out into the dark with your gear and some fully charged batteries. Come back when they (and maybe you) are spent. At best, you’ll have captured some interesting images. At worst, you’ll have learned a lot for your next shoot.

'Light Magic' by Amanda Knowles, Sony DCS-HX300, 9.53mm, 30secs at f/7.1, ISO 100
Nikolay’s Top Tips
• Make sure you do plenty of research and possess at least some knowledge of what light painting is, how it can be achieved and the camera settings you’ll need to achieve this.
• Always make sure you wear dark clothes, otherwise you’ll risk appearing in your shots when you’re in the frame painting with light.
• Start with the simplest drawings to begin with. Try drawing them several times on paper first until you’re confident enough to try it for real.
• Have several different light sources available to you on every shoot. You never know when inspiration will take hold.
• Never stop trying. Keep on and on until you get it right.

'The Superdome Factory' by Kevin Lajoie, Nikon D5000, 10-24mm, 480secs at f/5.6, ISO 400

Mathew Browne
Visit Mathew Photocrowd page
Dylan Arnold
Visit Dylan's Photocrowd page