Tips Feature
A Beginner's Guide to Zoo Photography
with Zdenka Janaskova and Philip Joyce
Great animal shots aren't only found in the wild. Zdenka Janaskova and Philip Joyce offer their top zoo photography tips

'Tigress & Cub' by Philip Joyce
1. Find a zoo near to you
While Zdenka takes advantage of some of the zoological gardens across Europe - in areas such as Bohemia, the Slovak Republic and Poland - most of Philip's shots are taken in zoos across the UK, and he's also produced images while visiting San Diego in California.
'The collections and the environments of the animal enclosures of each zoo vary hugely,' says Phillip. 'Checking individual websites will give you information about all the animals in each collection. If you would like to visit a British zoo, this website will give you details of the nearest locations.'

'Rhinos' by Zdenka Janaskova, Canon EOS 760D, 70-200mm, 1/2000sec at f/2.8, ISO 400

2. Plan ahead to make sure you see your favoured animals
There's nothing worse than getting to a zoo and then realising you are there at totally the wrong time to photograph your favoured animal. Some animals are at their most active at certain times, so talk to the zoo staff. Some animals will also be brought out for show and demonstrations for the public, so check the zoo's timetable to see when this happens.

'The Herd' by Philip Joyce
3. Think about what you want to achieve with your zoo images
So much of wildlife photography is time spent studying a particular animal and patiently waiting for it to reveal itself to you. Zoo photography is no different. As Zdenka says, taking pictures of animals in this intimate setting means you can take the time to witness their temperament, behaviour and social interactions. Once you've spent some time studying your subject, you can begin thinking about what you want from your image.
'It's easy to see the subject when you're stood in front of it, but you have to tease out the picture - they're rarely one and the same,' says Philip. 'As your experience builds, think about the ideas you will apply and start to visualise your final picture. There are several key things to think about.'
a) Will you be shooting through a fence?
On several occasions, you will be photographing subjects kept behind a mesh fence. Do you want to show this or mask it? Including this feature will lead to a totally different image and message. But if you want to hide it, remember that by using a shallow depth of field (f/5.6 or wider) and standing as close as possible to a fence, your lens will capture the light wrapping around the fence and throw it totally out of focus. This will then remove the feature from the image.
b) Will you be shooting through glass?
At other times, you may find yourself photographing through glass. In this case, get as close as you can to the glass to focus past the reflections. A good idea is to attach a lens hood and use that to rest against the glass. That will help to give you some support and eliminate camera shake if you're forced to work with slower shutter speeds. You could also consider investing in a polarising filter which should reduce the glare and reflections from the glass enclosures.
At other times, you may find yourself photographing through glass. In this case, get as close as you can to the glass to focus past the reflections. A good idea is to attach a lens hood and use that to rest against the glass. That will help to give you some support and eliminate camera shake if you're forced to work with slower shutter speeds. You could also consider investing in a polarising filter which should reduce the glare and reflections from the glass enclosures.

'Dance of the Japanese Sea Nettles' by Philip Joyce
c) How will the background affect the image?
Think about the background of your subject. Will its inclusion add or subtract from the overall image? Simplifying the scene by throwing the background out of focus with a wide-open aperture will help viewers 'see' your picture more easily and give the final image a three-dimensional feel. However, including it – assuming it's not too busy and cluttered – could add some context to the story of your image.
d) What kind of picture will it be?
In terms of picture content, think about what kind of picture you want to create:
– portraits
– abstract close-ups of textures of furs and skin
– colour or black & white
– intimate shots vs wider environmental shots.

'Crocodile' by Philip Joyce
4. Capture your subject through their distinctive details
A good example of thinking about the final result is that Zdenka often likes to home in on the unique details of her subjects.
'Most of the time, I'll try and focus on the animal's eyes, which is, of course, one of the staples of successful wildlife photography,' says Zdenka. 'You can see an example of this in my image 'Monkey'. It's an intimate and confrontational image that creates a connection between the subject and viewer.

'Monkey' by Zdenka Janaskova, Canon EOS 760D, 18-135mm, 1/40sec at f/5.6, ISO 1600
'However, there are many other occasions where a different part of the body will interest me, such as the patterns of their fur or the texture of the skin. If you contrast the 'Monkey Portrait' image with a shot like 'Zebra', you can see the difference but it's no less intimate. Photographing animals in zoos has taught me to notice these particular details in wildlife and realise that not all wildlife images have to be straightforward portraits. They can be something a little more abstract.'

'Zebra' by Zdenka Janaskova, Canon EOS 760D, 70-200mm, 1/250sec at f/2.8, ISO 100
5. Consider how your images will look in black & white
If you intend to convert your images into black & white, then this decision must be at the forefront of your mind throughout the entire process. In Zdenka's case, she has had to train her eye to determine if the shot she desires will benefit from a black & white conversion.
'What this means is that you must look at a scene and ask yourself if this is really going to work in black & white,' says Zdenka. 'How will the light look? Is there enough tonal contrast? Will the fur pattern or skin texture of a particular animal translate to monochrome? Learn to see the world in black & white.'

'Lick' by Philip Joyce
6. Never use flash
There may be occasions when the light is insufficient for the image you want and you may be tempted to employ some artificial light of your own. However, you must never use flash when shooting captive animals. As Philip points out, the majority of zoos prohibit the use of flash. An intense burst of light can be startling for animals and will be particularly troubling for wildlife that is used to more nocturnal conditions. One of the key things to remember as a wildlife photographer is that you must remain as unobtrusive as possible, even if you are shooting in captive conditions. You are simply there to observe, not to interfere.

'Guard' by Zdenka Janaskova, Canon EOS 760D, 70-200mm, 1/60sec at f/4.5, ISO 3200
7. Natural light will give you the most interesting results
'As the majority of zoos prohibit the use of flash, you have to rely on natural light,' says Philip. 'However, natural light is far more appealing and delivers much better results for zoo images. Light is, of course, a huge consideration and can make the difference between a successful and ordinary picture.'
Take some time studying the way light works within the habitat. Notice the way the subject looks within each area of the environment. Are there perhaps areas that feature shaded and lit areas that could lead to dramatic contrasts? Which areas feature hard or soft light?

'Feeding' by Philip Joyce
8. Use your camera's aperture priority mode
The intimate and consistent conditions of zoo habitats mean that you can also settle on a tried and tested system of exposure. Zdenka always sets her camera to aperture priority and her aperture to f/2.8. Opening up her aperture in this way means that her camera can cope with the sometimes-low light of zoo environments, and can achieve fast shutters speeds when the light is brighter, which is particularly important with moving subjects (1/1000sec in the case of her excellent shot, 'Elephant with Sand'). And, of course, she will always shoot in raw just in case she needs to give her exposure a boost in post-processing.

'Elephant with Sand' by Zdenka Janaskova, Canon EOS 760D, 70-200mm, 1/1000sec at f/2.8, ISO 100
9. Take control of your ISO
Not all the environments you work in will be necessarily conducive to open apertures and fast shutter speeds. Luckily, contemporary DSLRs - such as the Sony a7s II or the Nikon D7200 - can shoot at high ISOs without introducing noise into the image, but you need to understand your own camera and the ISOs that you can use safely.
'Remember to use your camera's acceptable ISO range to full effect, dialling it up or down according to the prevailing light levels,' says Philip. 'Auto-ISO will do this for you but the camera tends to play it safe by using a higher-than-necessary ISO, which may ultimately affect image quality.'

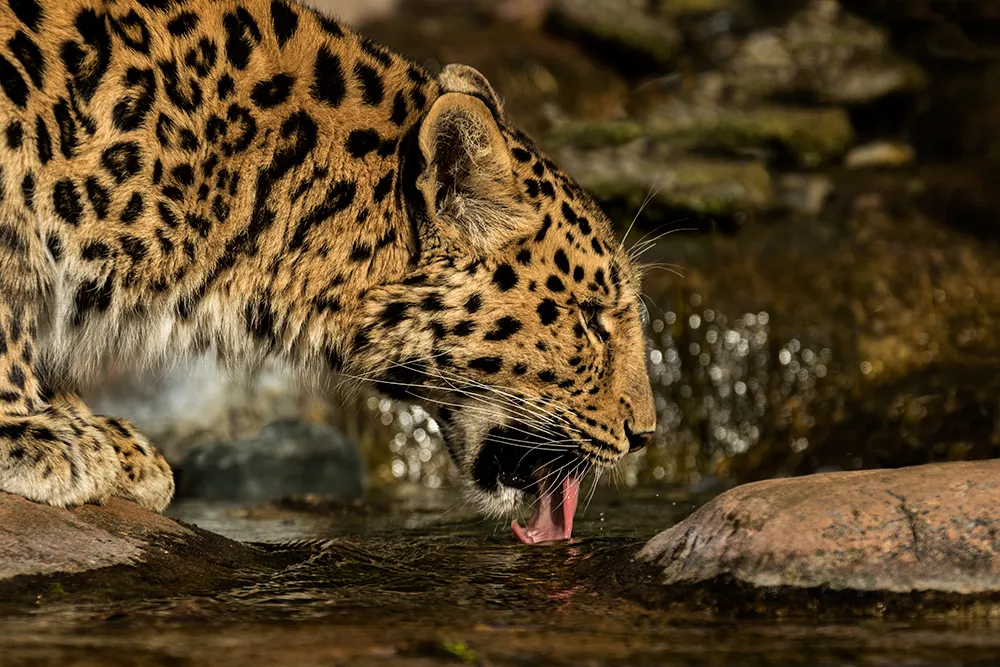
'Drinking' by Philip Joyce
10. Use your camera's metering system to achieve the most accurate exposure
'When thinking about my Canon's metering modes, I tend to favour evaluative metering [known as matrix metering on Nikon models] as it makes the most comprehensive assessment across the whole frame and is, in my opinion, usually the most accurate,' says Philip. 'Having said that, high contrast lighting can fool it, so (because I use aperture-priority mode) it's important to check the results and, if I need to, dial in +/- exposure with the exposure compensation control. This control is very useful and a deliberate under-exposure can produce very atmospheric results.'

'Cheetah' by Zdenka Janaskova, Canon EOS 760D, 70-200mm, 1/1000sec at f/2.8, ISO 200
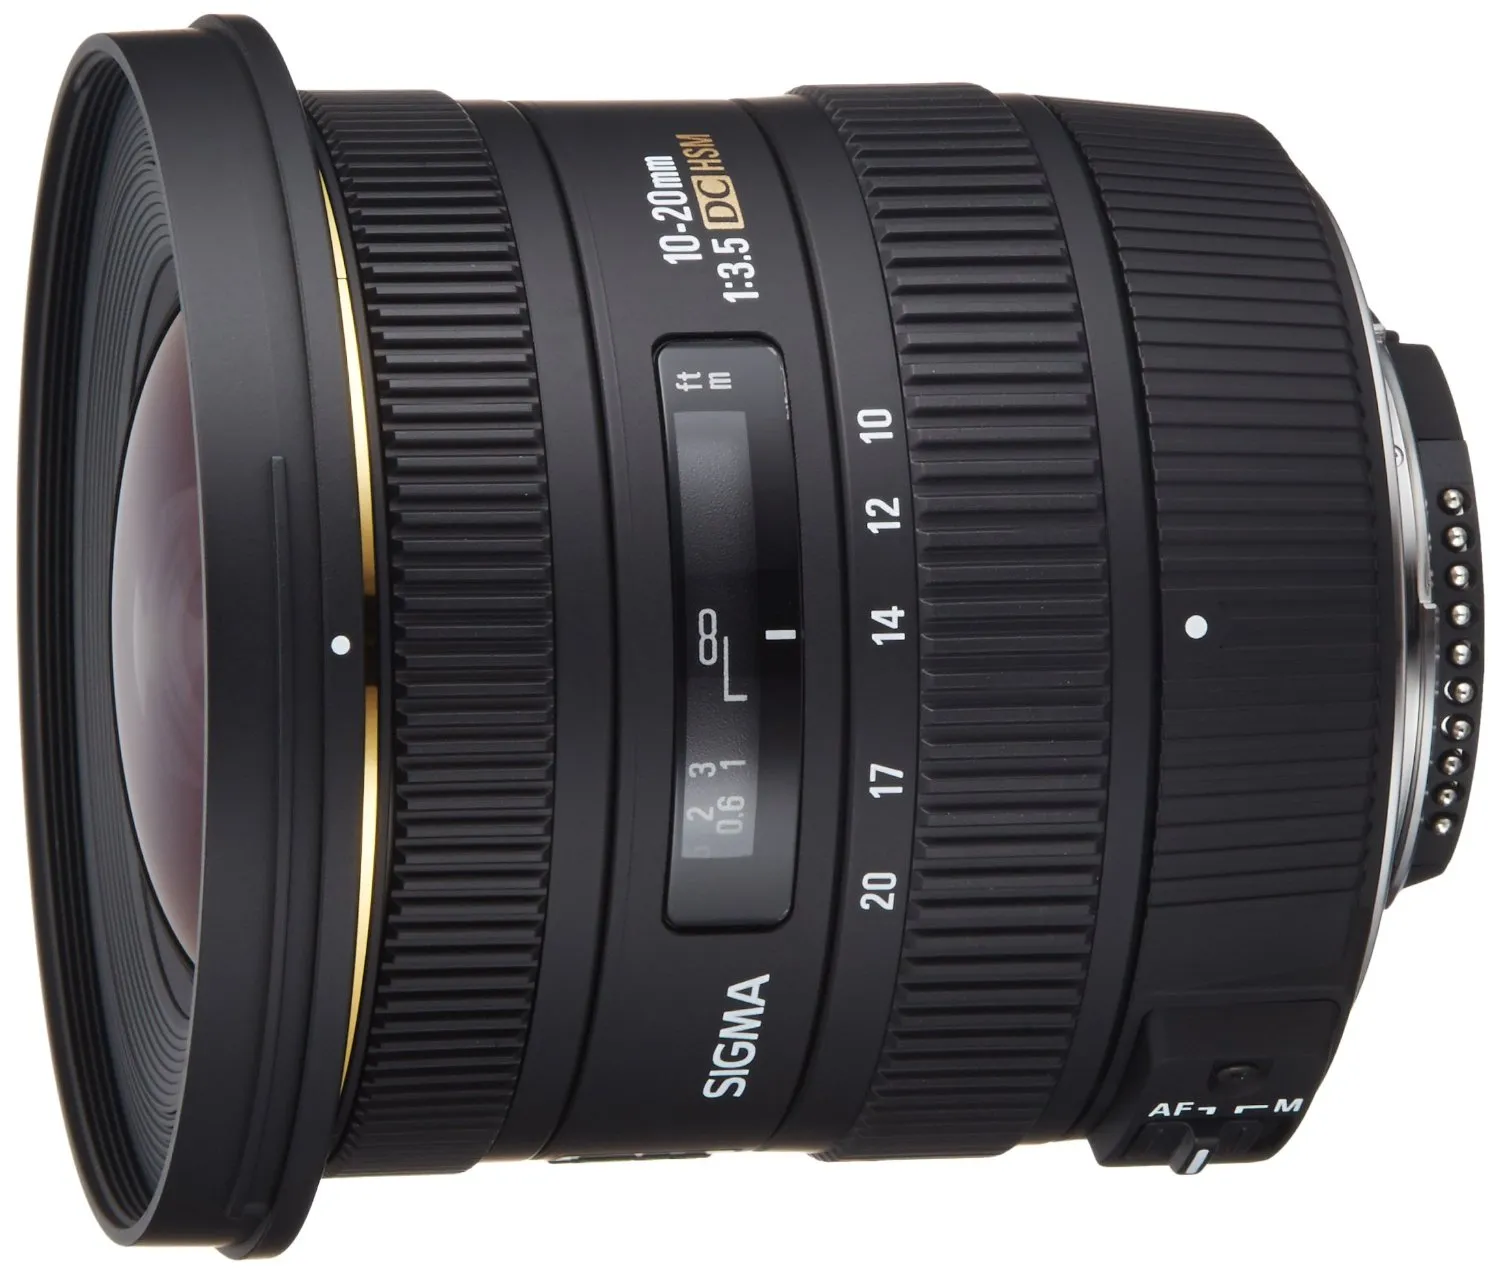
11. Experiment with a range of lenses
Zdenka's favourite lens, and the one she uses most often, is the Canon 70-200mm f/2.8. This is a particularly handy lens when shooting in zoo conditions as it means the distance between her and the subject is not an issue. As she is able to zoom in tight on her subject, she can easily remove the unwanted details of the zoo environment. It also means she can get close in on the intimate details of her subject.
– Sigma 10-20mm - 'This is great for showing the environment and working in enclosed areas. It can also create a sense of space and scale when used outside.'
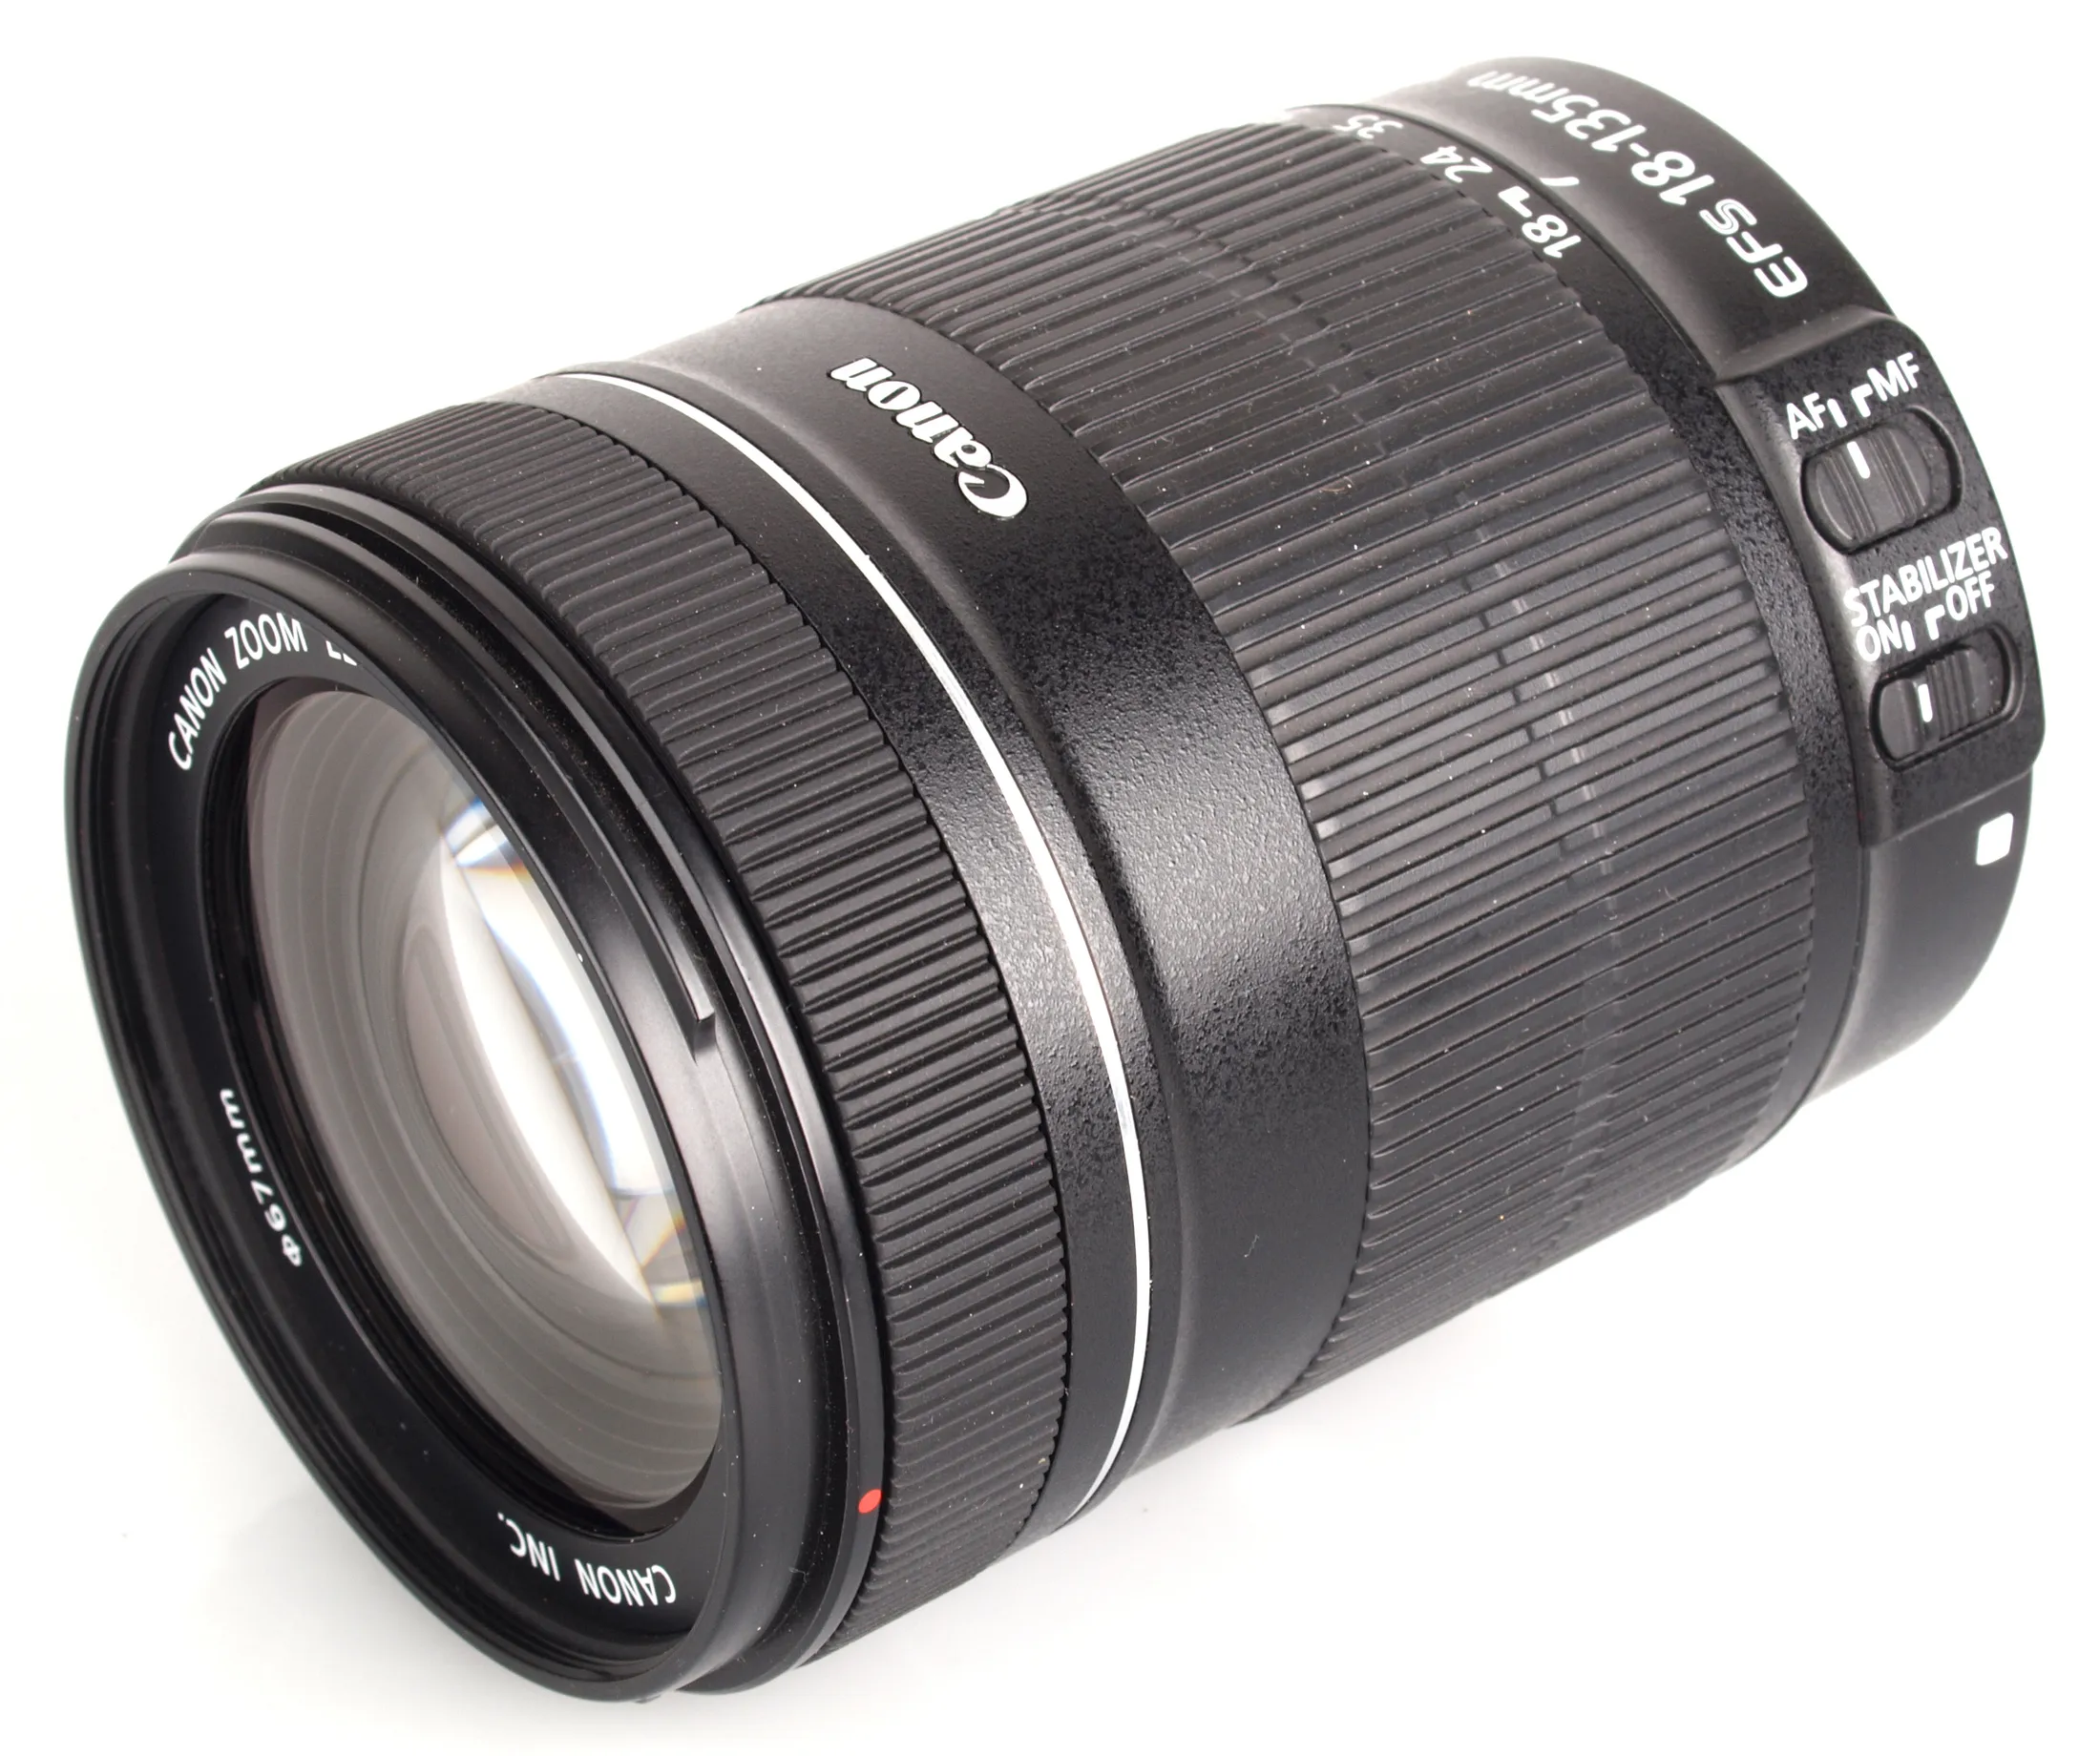
– Canon 18-135mm - 'A versatile all-rounder. You can achieve a great set of results with this focal-length range. The long telephotos get you in close and allow you to get portraits and abstract shots of the animals.
– Canon 100-400mm - 'A super-sharp and responsive lens.'
12. Don't use a tripod
Using a tripod in a zoo can be cumbersome and will likely get in the way of other visitors to the zoo - some zoos have taken the steps of forbidding them. That means you should leave yours at home. If you really require some camera support then it's worth investing in a monopod. This will give you more stability and will not get in anyone's way.

'Underwater' by Philip Joyce
13. Be sensitive to the emotive nature of zoo photography
'Zoos are an emotive topic,' says Philip. 'There are many people opposed to their existence, while there are others who support the conservation work funded by zoos and the inspiration of new generations seeing these impressive animals. With that in mind, you must always be honest about where your images were taken. It would be completely wrong to enter a shot of a captive animal in a wildlife competition, for example. While a picture should be enjoyed for what it is, the back-story of location and circumstances often enhance the pictorial story, so why not proudly tell it as it is?'

One of Zdenka's strongest shots is called Ape in Captivity (below). It's a simple image that through its subject and title says so much.
'I'll be honest, sometimes I'm crying when I see the animals in captivity,' says Zdenka. 'They're imprisoned and have no freedom. But if these animals were not in zoos, I would not have seen these animals with my own eyes. The thing I realised is that every animal in captivity has a story. The best I can do is watch them and try to capture their feelings and frustrations. In my opinion, all wildlife and zoo photography should have some sort of message.'

'Ape in Captivity' by Zdenka Janakova, Canon EOS 760D, 70-200mm, 1/100sec at f/2.8, ISO 6400