Tips Feature
Summertime Silhouette Photography
It's time to take advantage of the sunny weather and build images around this season's strong light. We present a guide to creating effective silhouette images
Every season has its advantages for a photographer. And with the first instances of summer, here comes the sun. Take a walk through any city or sweeping landscape and the summer sun is bringing even the most mundane scene to life. Shadows and silhouettes are everywhere and are a quick and easy way to give your images drama and mystery. Photography is often about including as much information as possible, but silhouette photography demands the opposite.
1. Select your subject
Choose a subject that has a defined and strong outline. And it's important the viewer is able to recognise the subject just from its shape. Take a look through a selection of silhouette images and you'll soon recognise that every subject is instantly recognisable. That's why we see so many silhouettes of people, stags stood on top of hills, giraffes on safari, lone trees on hills and cyclists on bridges – you know exactly what they are just from their outline.
Take this image by Tim Crabb. This is a classic subject and a great example of selecting a strong subject – two subjects, in fact: the monk and the bridge. We also get a sense of story, and the perfect circle of the sun framed in the bottom third of the bridge's supports is an added bonus.

‘Enlightened' by Tim Crabb

2. Shoot at sunrise or sunset
Just after sunrise and before sunset, both known as the golden hour, are when the sun is at its lowest in the sky. You can then place your subject easily between you and the sun, and render them as a solid block of black. You’ll find it more difficult to render silhouettes in the middle of the day, when the sun is at its highest.
In this image, ‘Typical Dutch' by George Kossieris, you can see that he has placed the low sun directly behind the windmill and exposed for the sky. This has meant there is a loss of detail on the subject yet it is lit from behind by the natural light. Note also those lush tones of the sky.

‘Typical Dutch' by George Kossieris, Nikon D5300, 17-50mm, 1/125sec at f/11, ISO 100
3. Include some sunburst
If you can angle your subject and position just right then you can include the deeply attractive element of a sunburst. This occurs when the sun is just peaking around your subject or the edge of your frame and will result in attractive shafts of light bleeding into the scene, such as in this image by Chris Cousins.

‘Paragliding into the Sun' by Chris Cousins, Canon EOS 5DS R, 24-70mm, 1/160sec at f/22, ISO 100
4. Expose for the highlights
If you leave your camera set to auto exposure, then it will attempt to find a middle-ground between all of the information in your scene. That's why it's best to either shoot manual or set your camera to either aperture or shutter priority and add exposure compensation. The important thing is that you set your exposure to accurately capture the highlights of your scene, such as the sky or any place where the sun's illumination is at its strongest.
As you're dealing with scenes containing a variety of shadows and highlights, you'll want to set your camera to spot metering so that your camera can expose for a specific area. Each camera manufacturer has their own version of this so consult your camera's manual. The important thing is to ensure your camera is not giving you an overall evaluative metering. (the explanation of why is included in the above point)
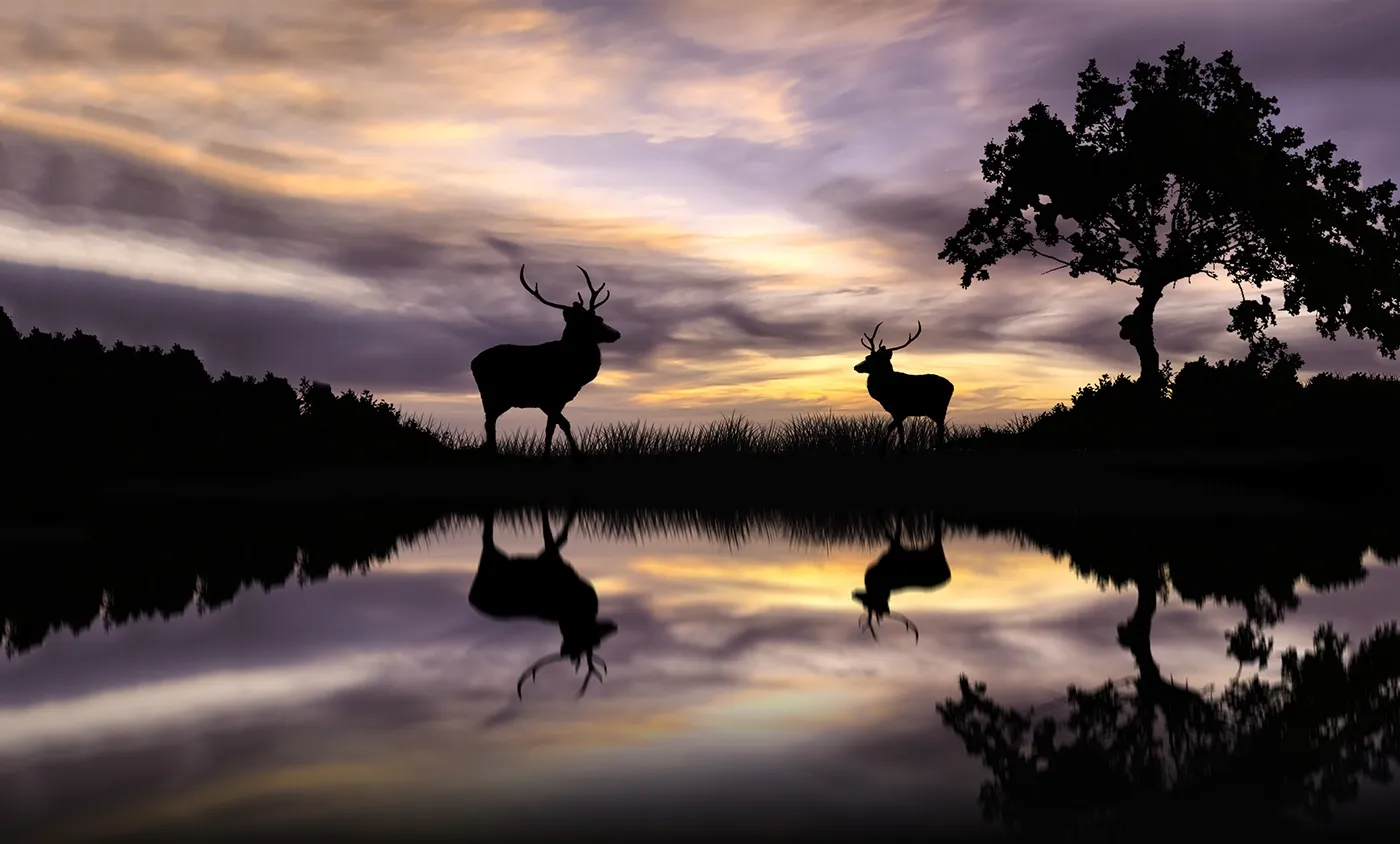
Once your camera is set to spot metering, you can manually select the area of your scene that will act as your scene's base exposure measure.

‘Deer Silhouette' by Lyndon Hatherall, exposure unknown
5. Use shutter priority or manual mode for moving subjects
If your scene features moving subjects, then shutter priority or manual mode is recommended. These allow you to set your camera to a shutter speed that works for the particular speed of your moving subject. In shutter priority mode the camera will work out the aperture, then you can use the exposure compensation dial to get the exposure right for a silhouette shot. But if the range of exposure compensation (often 2 stops either side) is not enough to give you a strong enough silhouette, then it’s over to manual mode for full control.
Take a look at this image by Agnieszka Maruszczyk and you'll see that the photographer has exposed for the highlights (the background) and has therefore rendered the foreground subject (the person) as a silhouette. While the shutter speed isn't terribly fast, it's enough to capture a defined and frozen subject.

‘Light and Shadows on the Streets of Havana' by Agnieszka Maruszczyk, Nikon D750, 24-70mm, 1/160sec at f/10, ISO 100
6. Get your focussing right
Shooting stationary subjects, such as trees, should present no difficulties for your camera’s autofocus function. You can also try selecting an aperture of around f/11 or f/16 to ensure your scene has enough depth of field coverage.
If your scene features moving subjects, such as pedestrians, then you can use your camera's focus tracking function. As with spot metering mentioned earlier, each manufacturer will have its equivalent (AI Servo for Canon, AF-C for Nikon and AFC+TR for Olympus - check your camera's manual). Focus tracking means your camera will identify the moving subject and continuously shift its focus to keep that subject sharp no matter where it moves in the frame. As with standard autofocus, focus tracking is activated by pressing the shutter halfway down.

‘A Walk in the Park' by Cristina Krippahl, Pansonic DMC-FZ1000, 160mm, 1/160sec at f/8, ISO 160
7. Keep your ISO low
Many of today's cameras are more than capable of coping with high ISOs without introducing noise. That said, it's still best to minimise the risk by keeping your camera's ISO as low as possible. The last thing you want is your image being spoiled by unsightly grain appearing in the darkest parts of your image.

‘Porthtowan Silhouette, Cornwall England, UK' by Paul Nash, Pentax K-5, 18-55mm, 13secs at f/8, ISO 200
8. Shoot in raw
It should go without saying, but you should always shoot raw. This is especially important for silhouette photography as you're dealing with very specific exposures. Shooting raw gives you maximum control over your image files and enables you to pull or push the brightness and contrast of your silhouette images. It also allows you to get rid of any unwanted detail in your subjects.

‘Going Home' by Chee Keong Lim, Canon 1DX, 70-200mm, 1/1250sec at f/2.8, ISO 320
9. Shoot in black & white
We've seen that colour can be effective, but shooting or converting your images to black & white can be equally as beautiful. In fact, this is an incredibly popular way of shooting silhouetted scenes. Silhouettes are about reducing the scene down to its most basic formal components so it makes sense that you should remove colour as well. This works especially well in city scenes. If you think of your composition as an interaction of basic lines and shapes then the city, with its copious squares, rectangles and lines is ideal.
Look at the figure in this by Stefan Nielsen. It's a prime example of how to use black & white to break down the scene.

‘Alone' by Stefan Nielsen, Canon EOS 5D, 400mm, 1/320sec at f/16, ISO 200
