
Masters of Photography
How to Shoot Like Ansel Adams
Ansel Adams is perhaps the greatest landscape photographer who ever lived. We take a look at some of the techniques that helped establish him as a master of photography
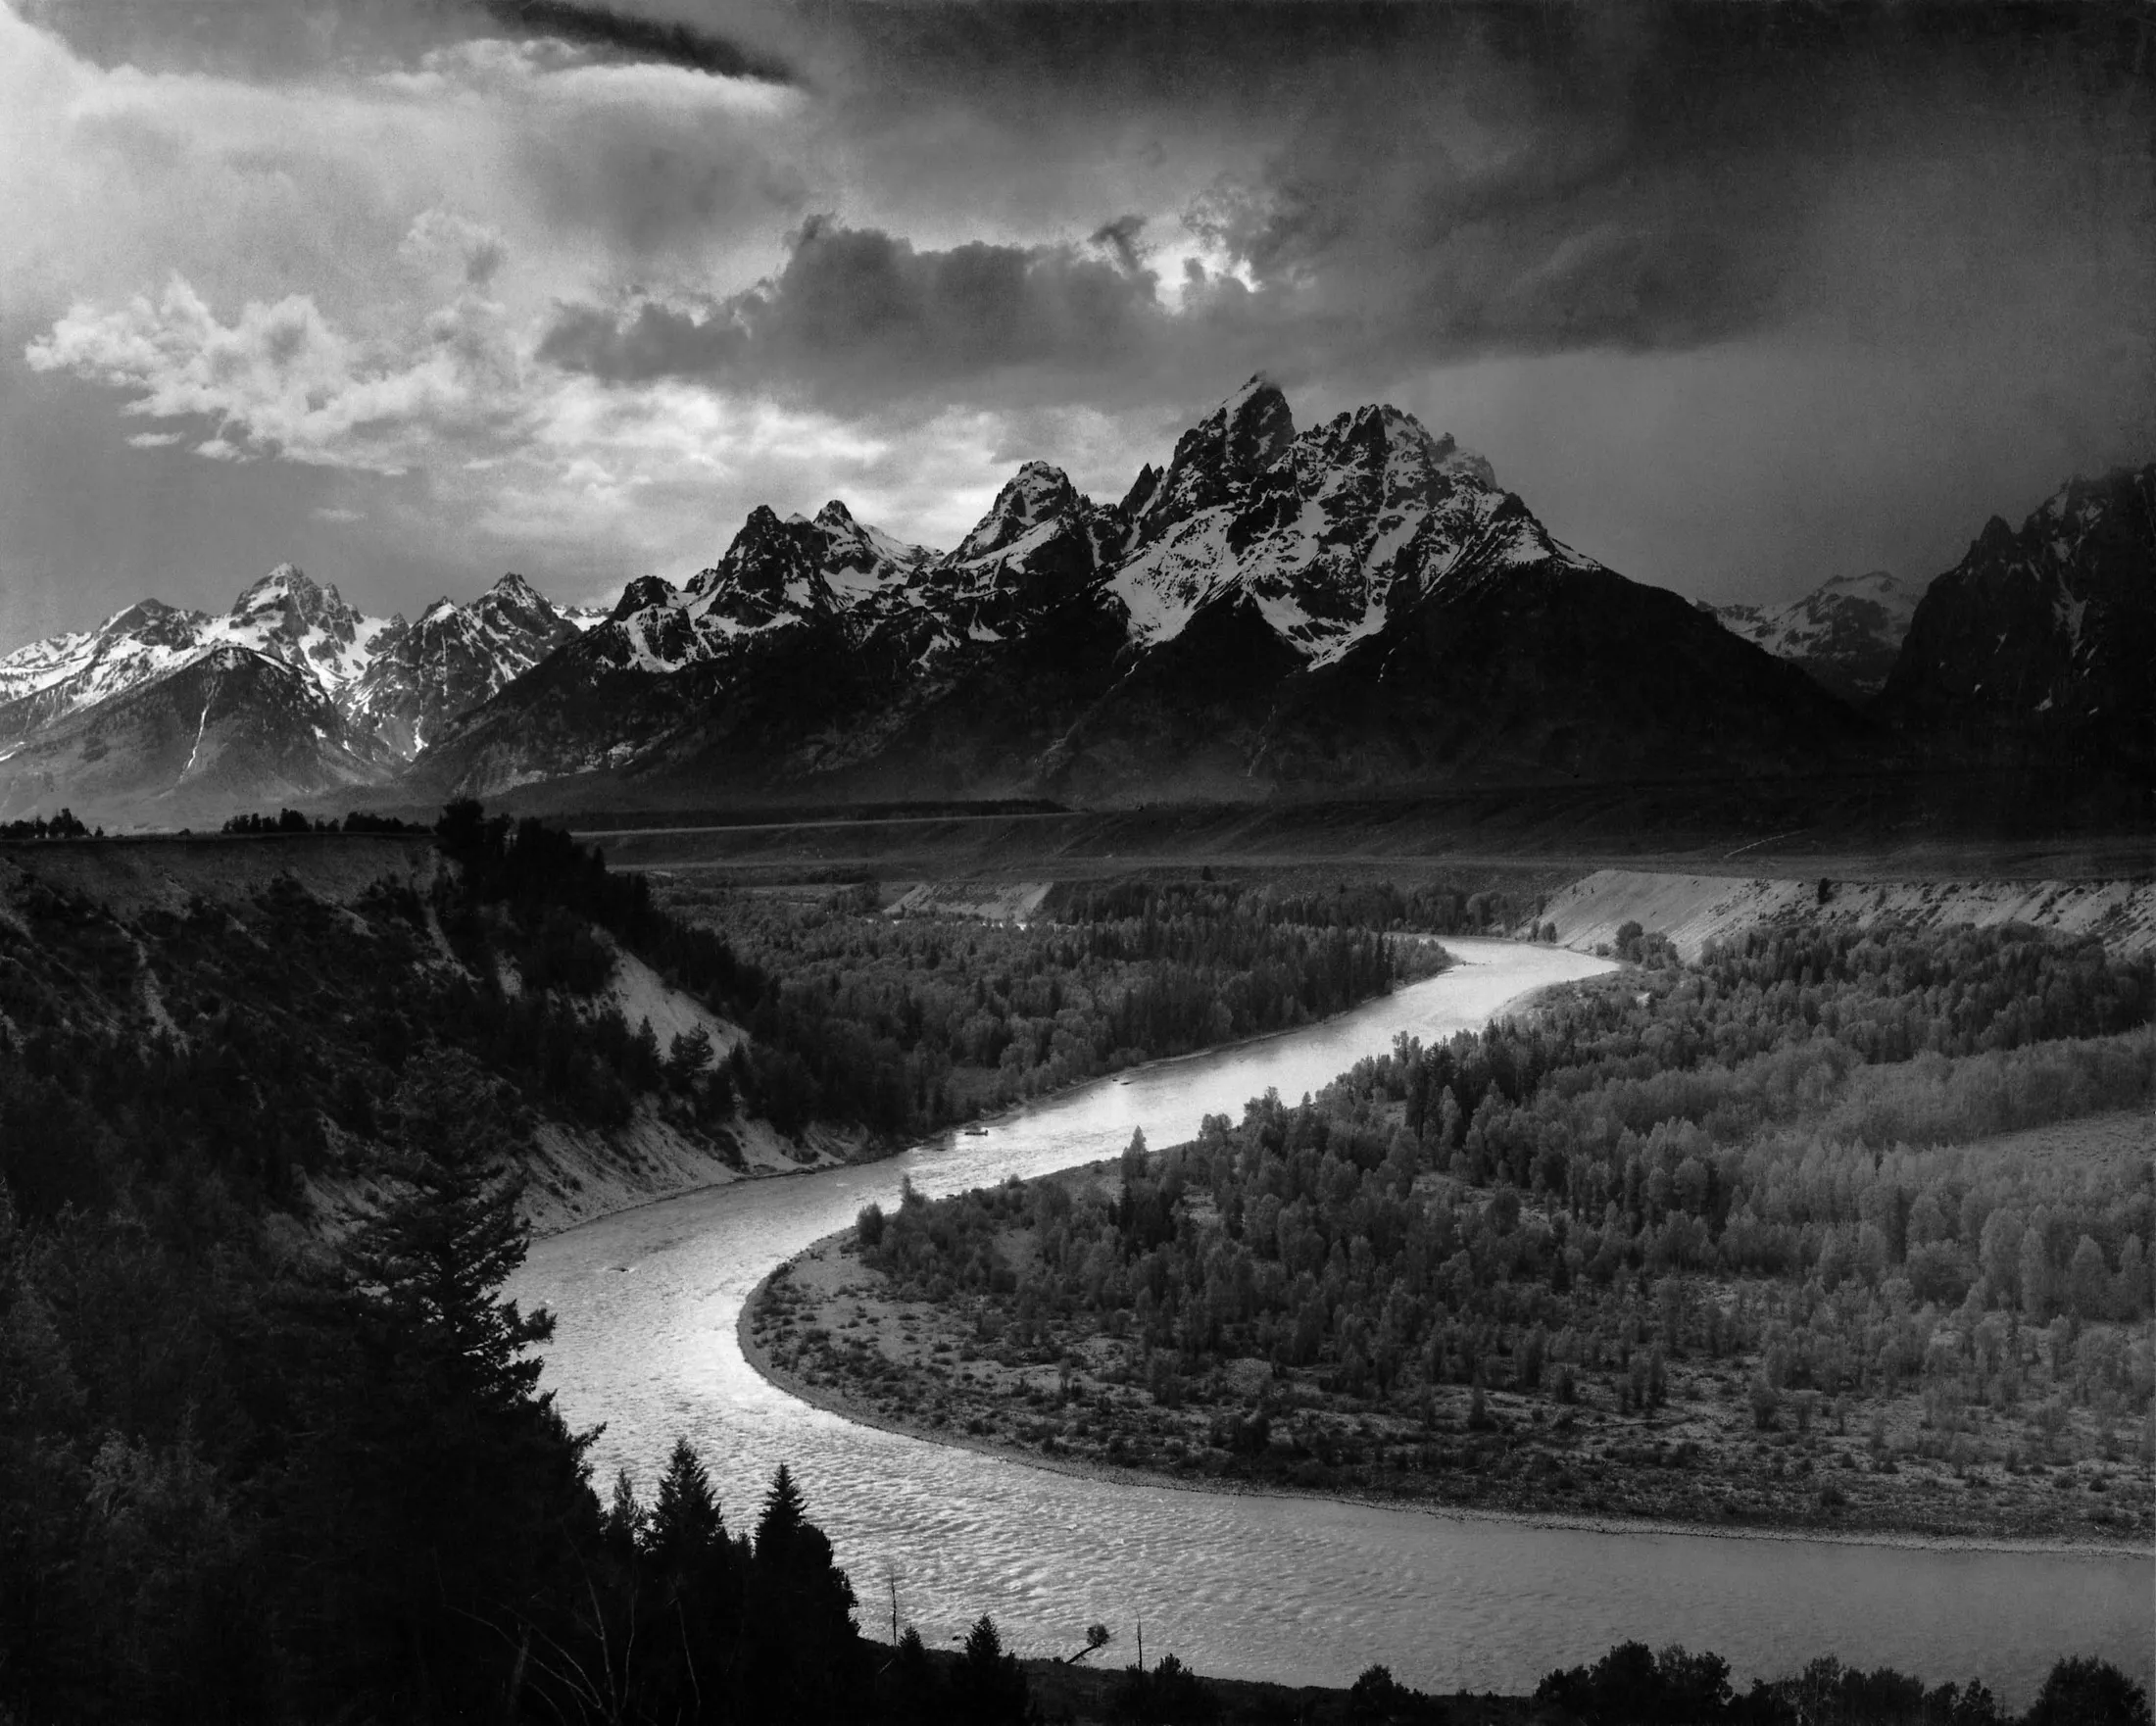
‘The Tetons and the Snake River’ (1942) © U.S. The National Archives and Records Administration
Know the location
Ansel Adams, who died in 1984, became famous for his jaw-dropping images of the American West and helped to define Yosemite Park in California as a place of stunning natural beauty. But Adams’ images were hard-earned. The intrepid photographer would spend hours on his feet hiking and trekking up mountains to the point that he came to know the location to an instinctual degree. It’s crucial to spend time in your location. Examine every angle and vantage point. ‘A good photograph is knowing where to stand,’ in the words of the master himself. Only when you come to know a location can you truly understand how best to capture its sublime majesty.
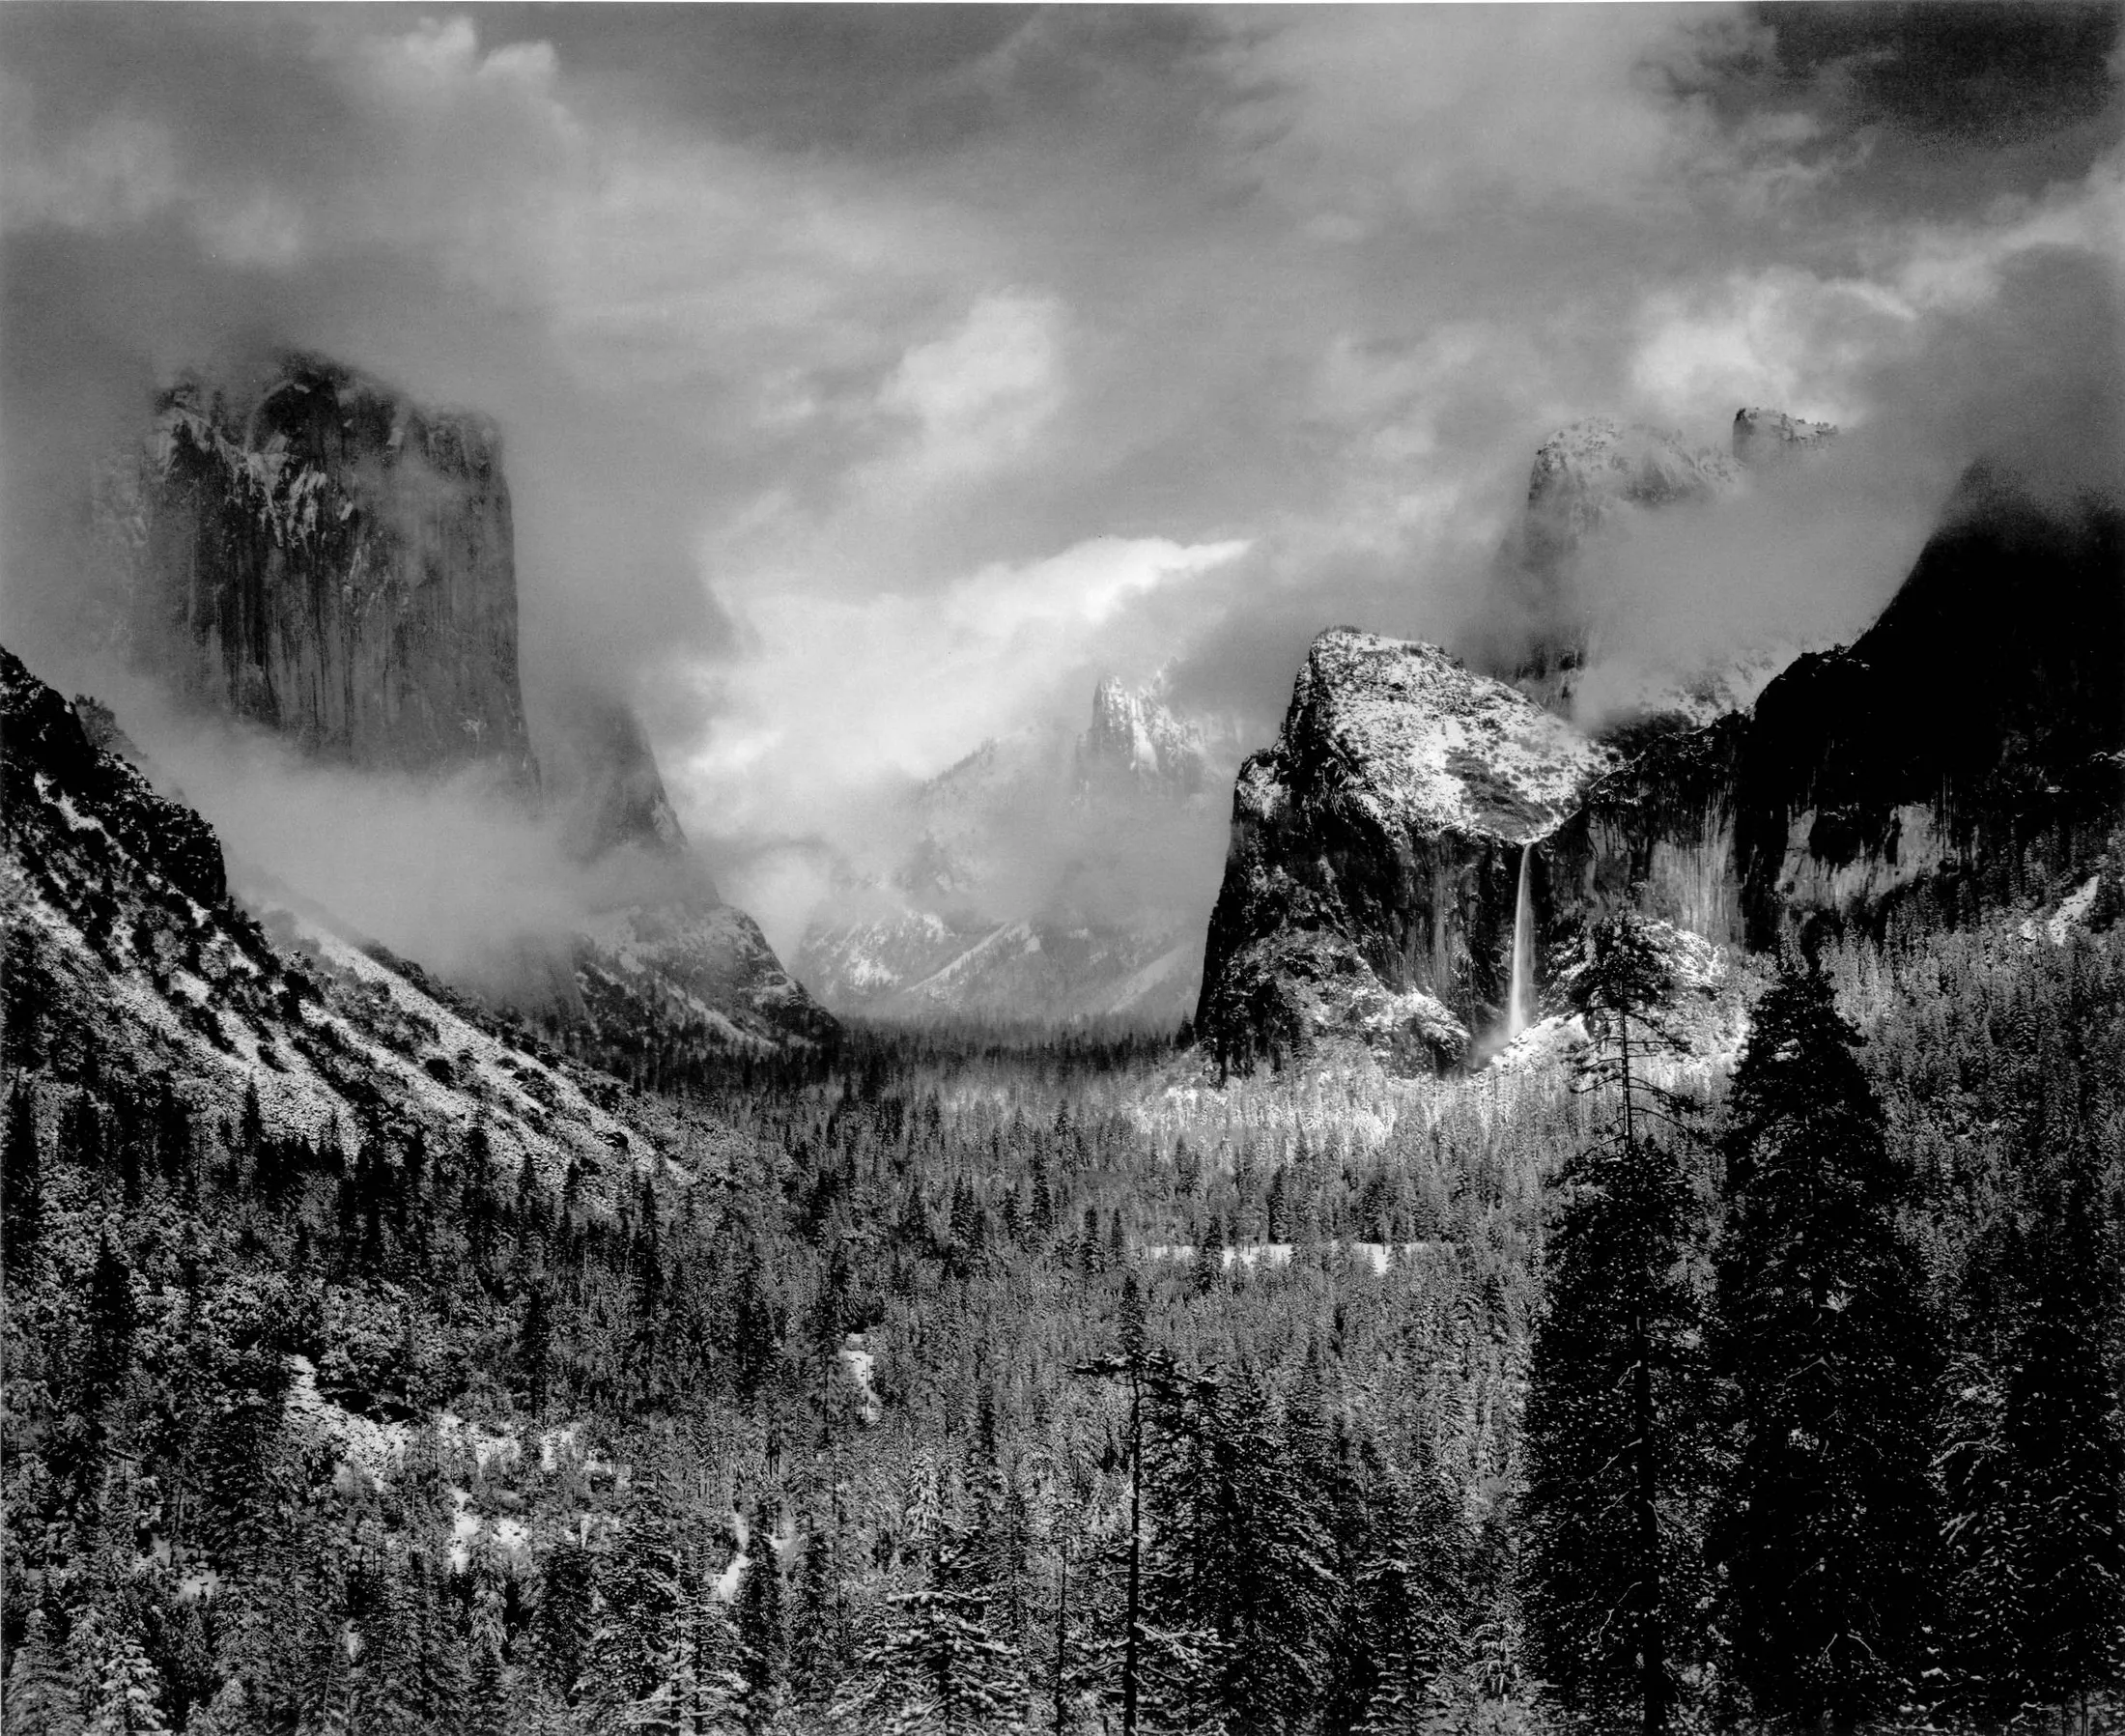
'Clearing Winter Storm' (1935) © The Ansel Adams Publishing Rights Trust

Get your images pin-sharp
You can see that each and every one of Adams’ images is notably for its absolute clarity. Every scene is pin-sharp and displays a depth of field that reaches from near to far. Adams eventually gathered a group of like-minded photographers, including Alfred Stieglitz and Edward Weston, all of whom sat beneath the banner ‘Group f/64’. This was a means for a set of individuals to reject the then predominant aesthetic of soft and impressionistic landscapes. These photographers wanted every single element of their shots on lucid display within the frame.
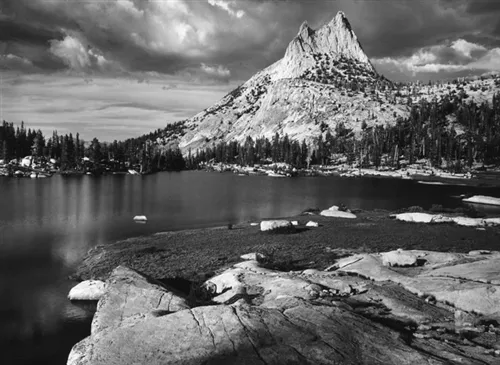
Cathedral Peak and Lake 1938 © The Ansel Adams Publishing Rights Trust
Shoot black & white
In Adams’ images, black & white does what it does best – it strips the scene down and reduces it to its most basic components. We can revel in the beautiful location, study the almost sensual forms of the mountains, foliage and waterfalls and allow ourselves to vanish into the scene. Adams firmly believed that he was not showing his audience images; he was showing them feelings and emotions. The romantic aesthetic of black & white emphasises that point.
Yosemite © The Ansel Adams Publishing Rights Trust
Try and visualise your scenes
Adams believed strongly in the notion of ‘visualisation’, though today you’ll likely hear it referred to as ‘previsualisation’. This involves a photographer standing in front of a scene and seeing the final image in their mind (right down the post-processing) before even pressing the shutter. This is a process that takes some years to develop and comes only with ample experience. The lesson here is to take your time when you arrive on a scene. Leave your camera in the bag, stand in front a landscape and really look at what you want to achieve.
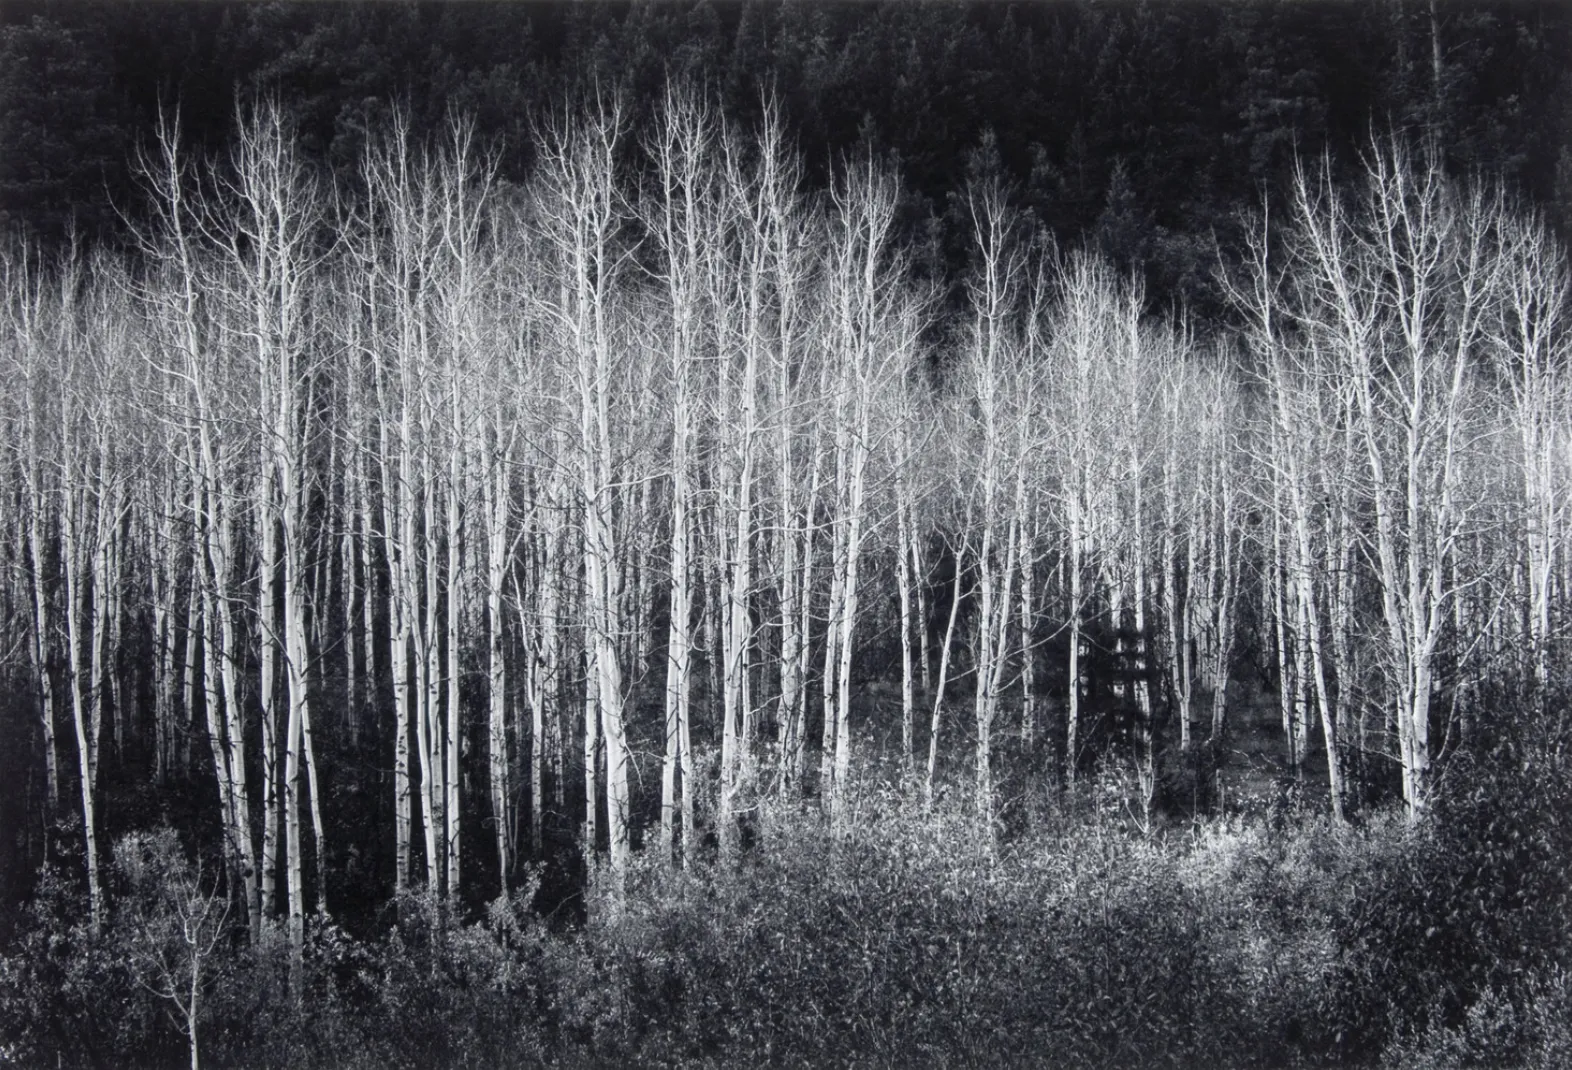
‘Aspens’ © The Ansel Adams Publishing Rights Trust
Consider the Zone System
One of the ways in which Adams was able to visualise his scenes and guarantee correct film exposure and darkroom development was by establishing his famous zone system (actually developed in collaboration with Fred Archer). This system placed a numeric value on each degree of shade and light, starting at 0 for pure black, through to 5 for middle grey and ending on 10 for pure white with no detail. This meant that even in the trickiest conditions, such as backlighting or extreme tonal contrasts, Adams could meter his scenes accurately and walk away confident he had the shot in his head. This is a method that is crucial for you, even if you’re shooting digitally, so that you can take control of your camera’s manual functions.

Siesta Lake 1958 © The Ansel Adams Publishing Rights Trust
Develop a relationship with your equipment
Spend time with your camera, learn how it feels in your hands and carry it with you wherever you go. Begin to appreciate its virtues and limitations. Understanding your gear will be help you to maximise your output. That’s why Adams was able to take his famous image, ‘Moonrise Over Hernandez’. Driving along one night, he saw the scene, jumped out of his car and took the shot. He could do this because the camera was an extension of him. He didn’t even need to think about it.
‘Moonrise Over Hernandez’ (1941) © The Ansel Adams Publishing Rights Trust
Consider shooting with a full-frame DSLR
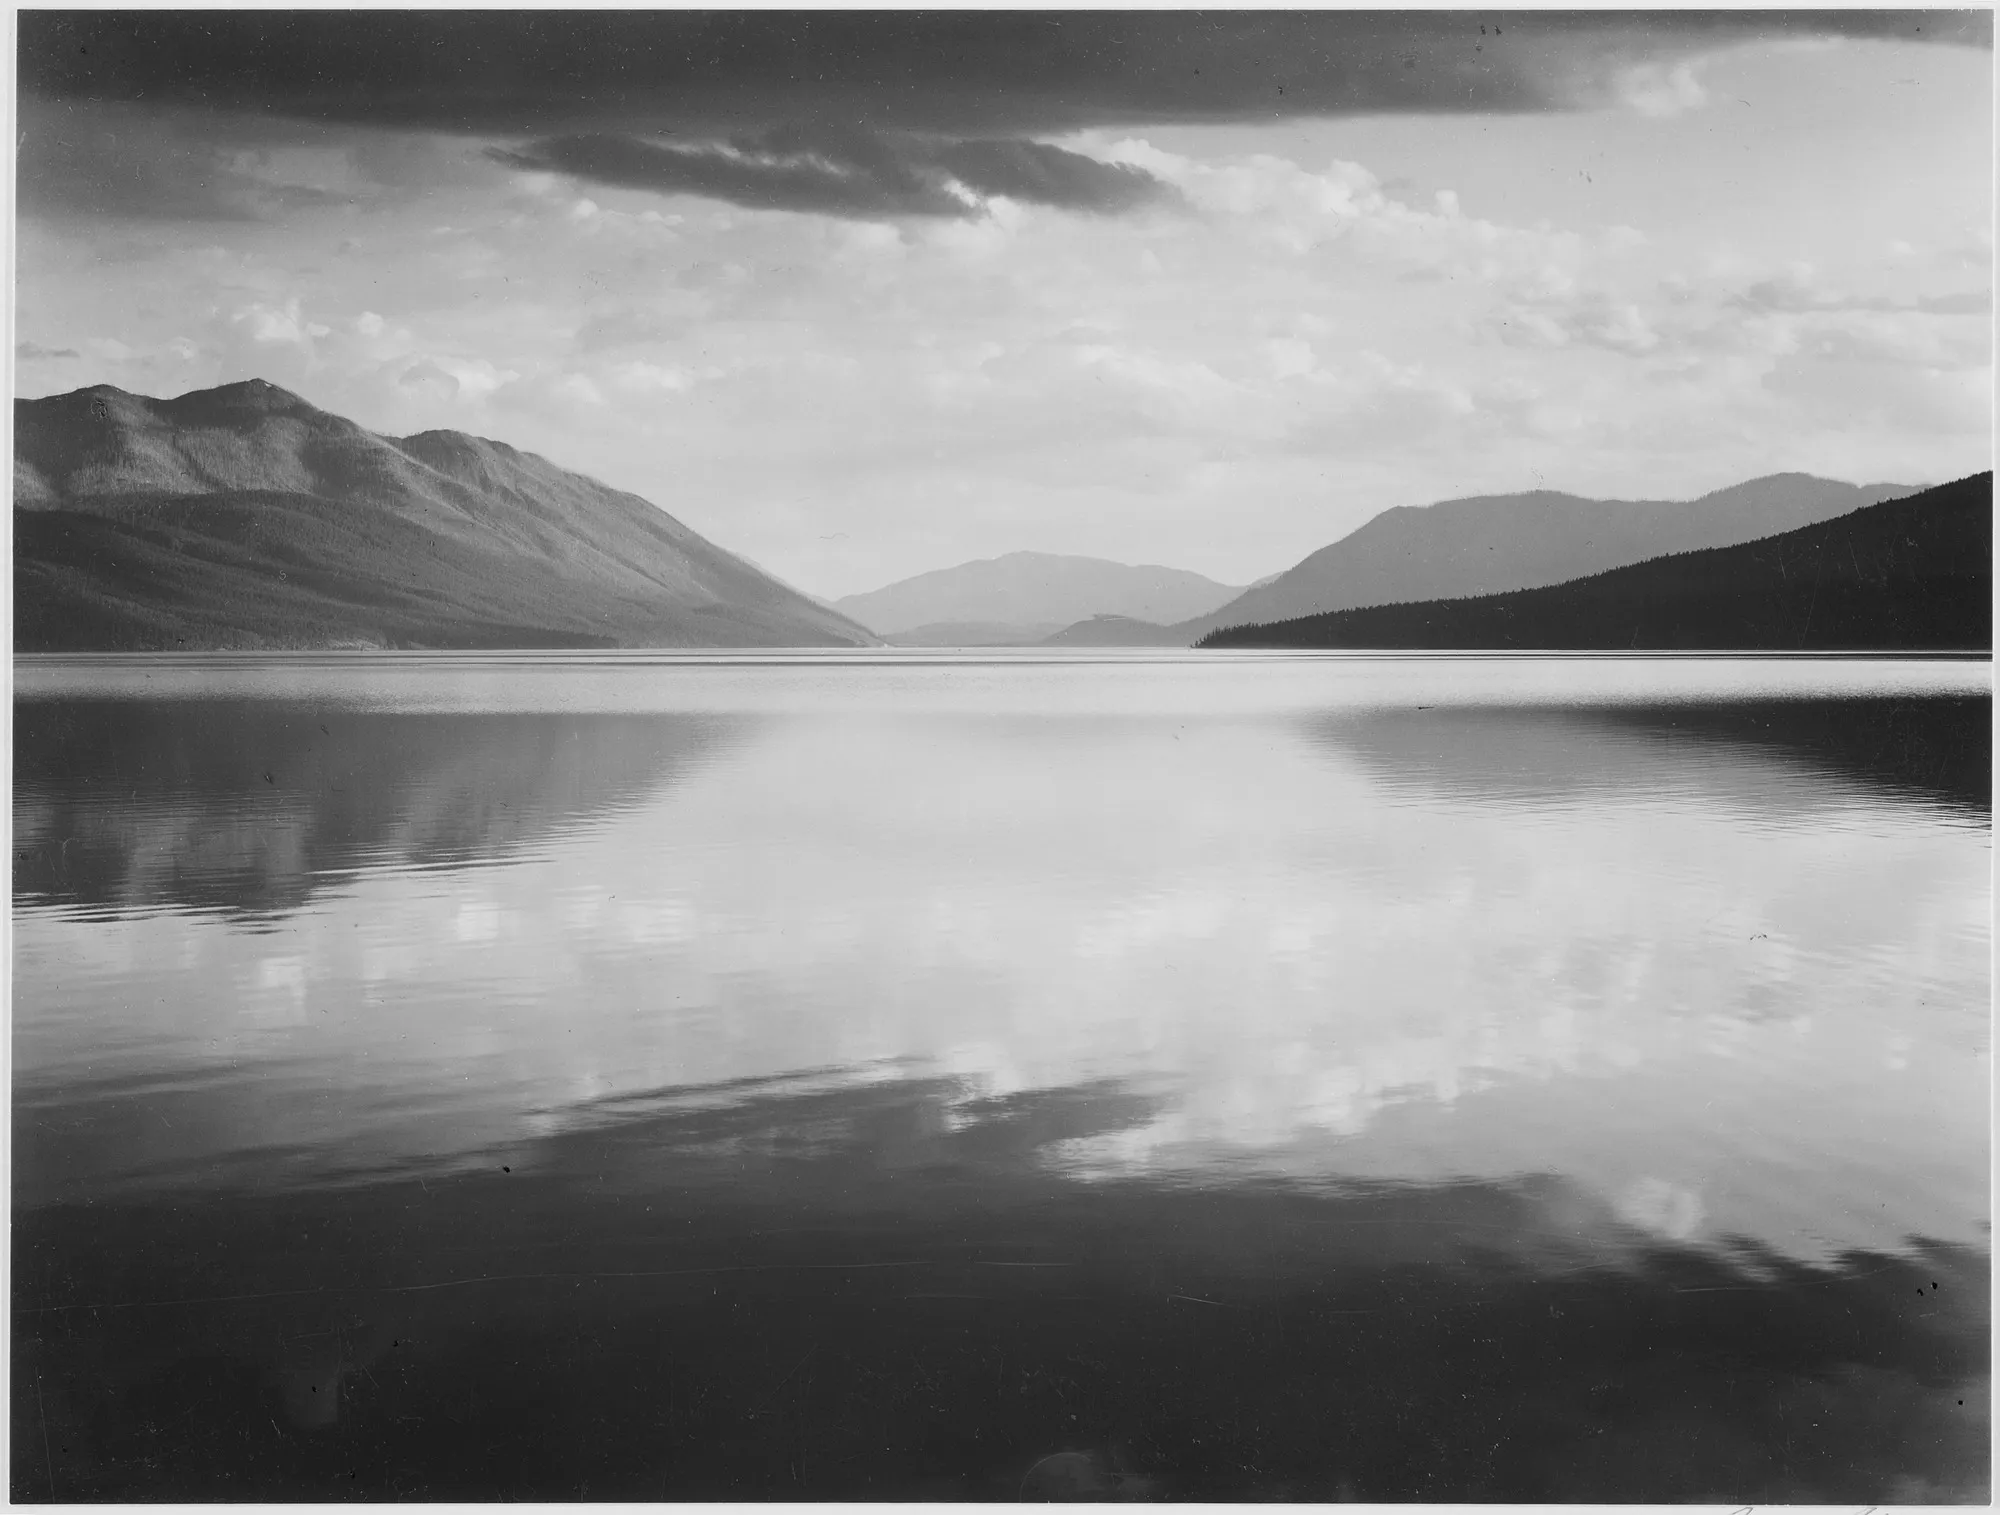
Adams used a variety of cameras throughout his career including 35mm and medium format. However, he is most famous for his large-format work. Unless you have access to expensive digital backs, it’s more likely you’ll be shooting with DSLRs. If that’s the case, it’s worth looking into shooting with a full-frame model, such as the Nikon D850, Canon EOS 5D Mark IV, Sony Alpha A99 II or the Pentax K-1. These cameras will guarantee good dynamic range and high pixel counts. That said, there are a number of landscape photographers working well with smaller-sensor models so don’t be discouraged if a full-frame model is out of your price range.
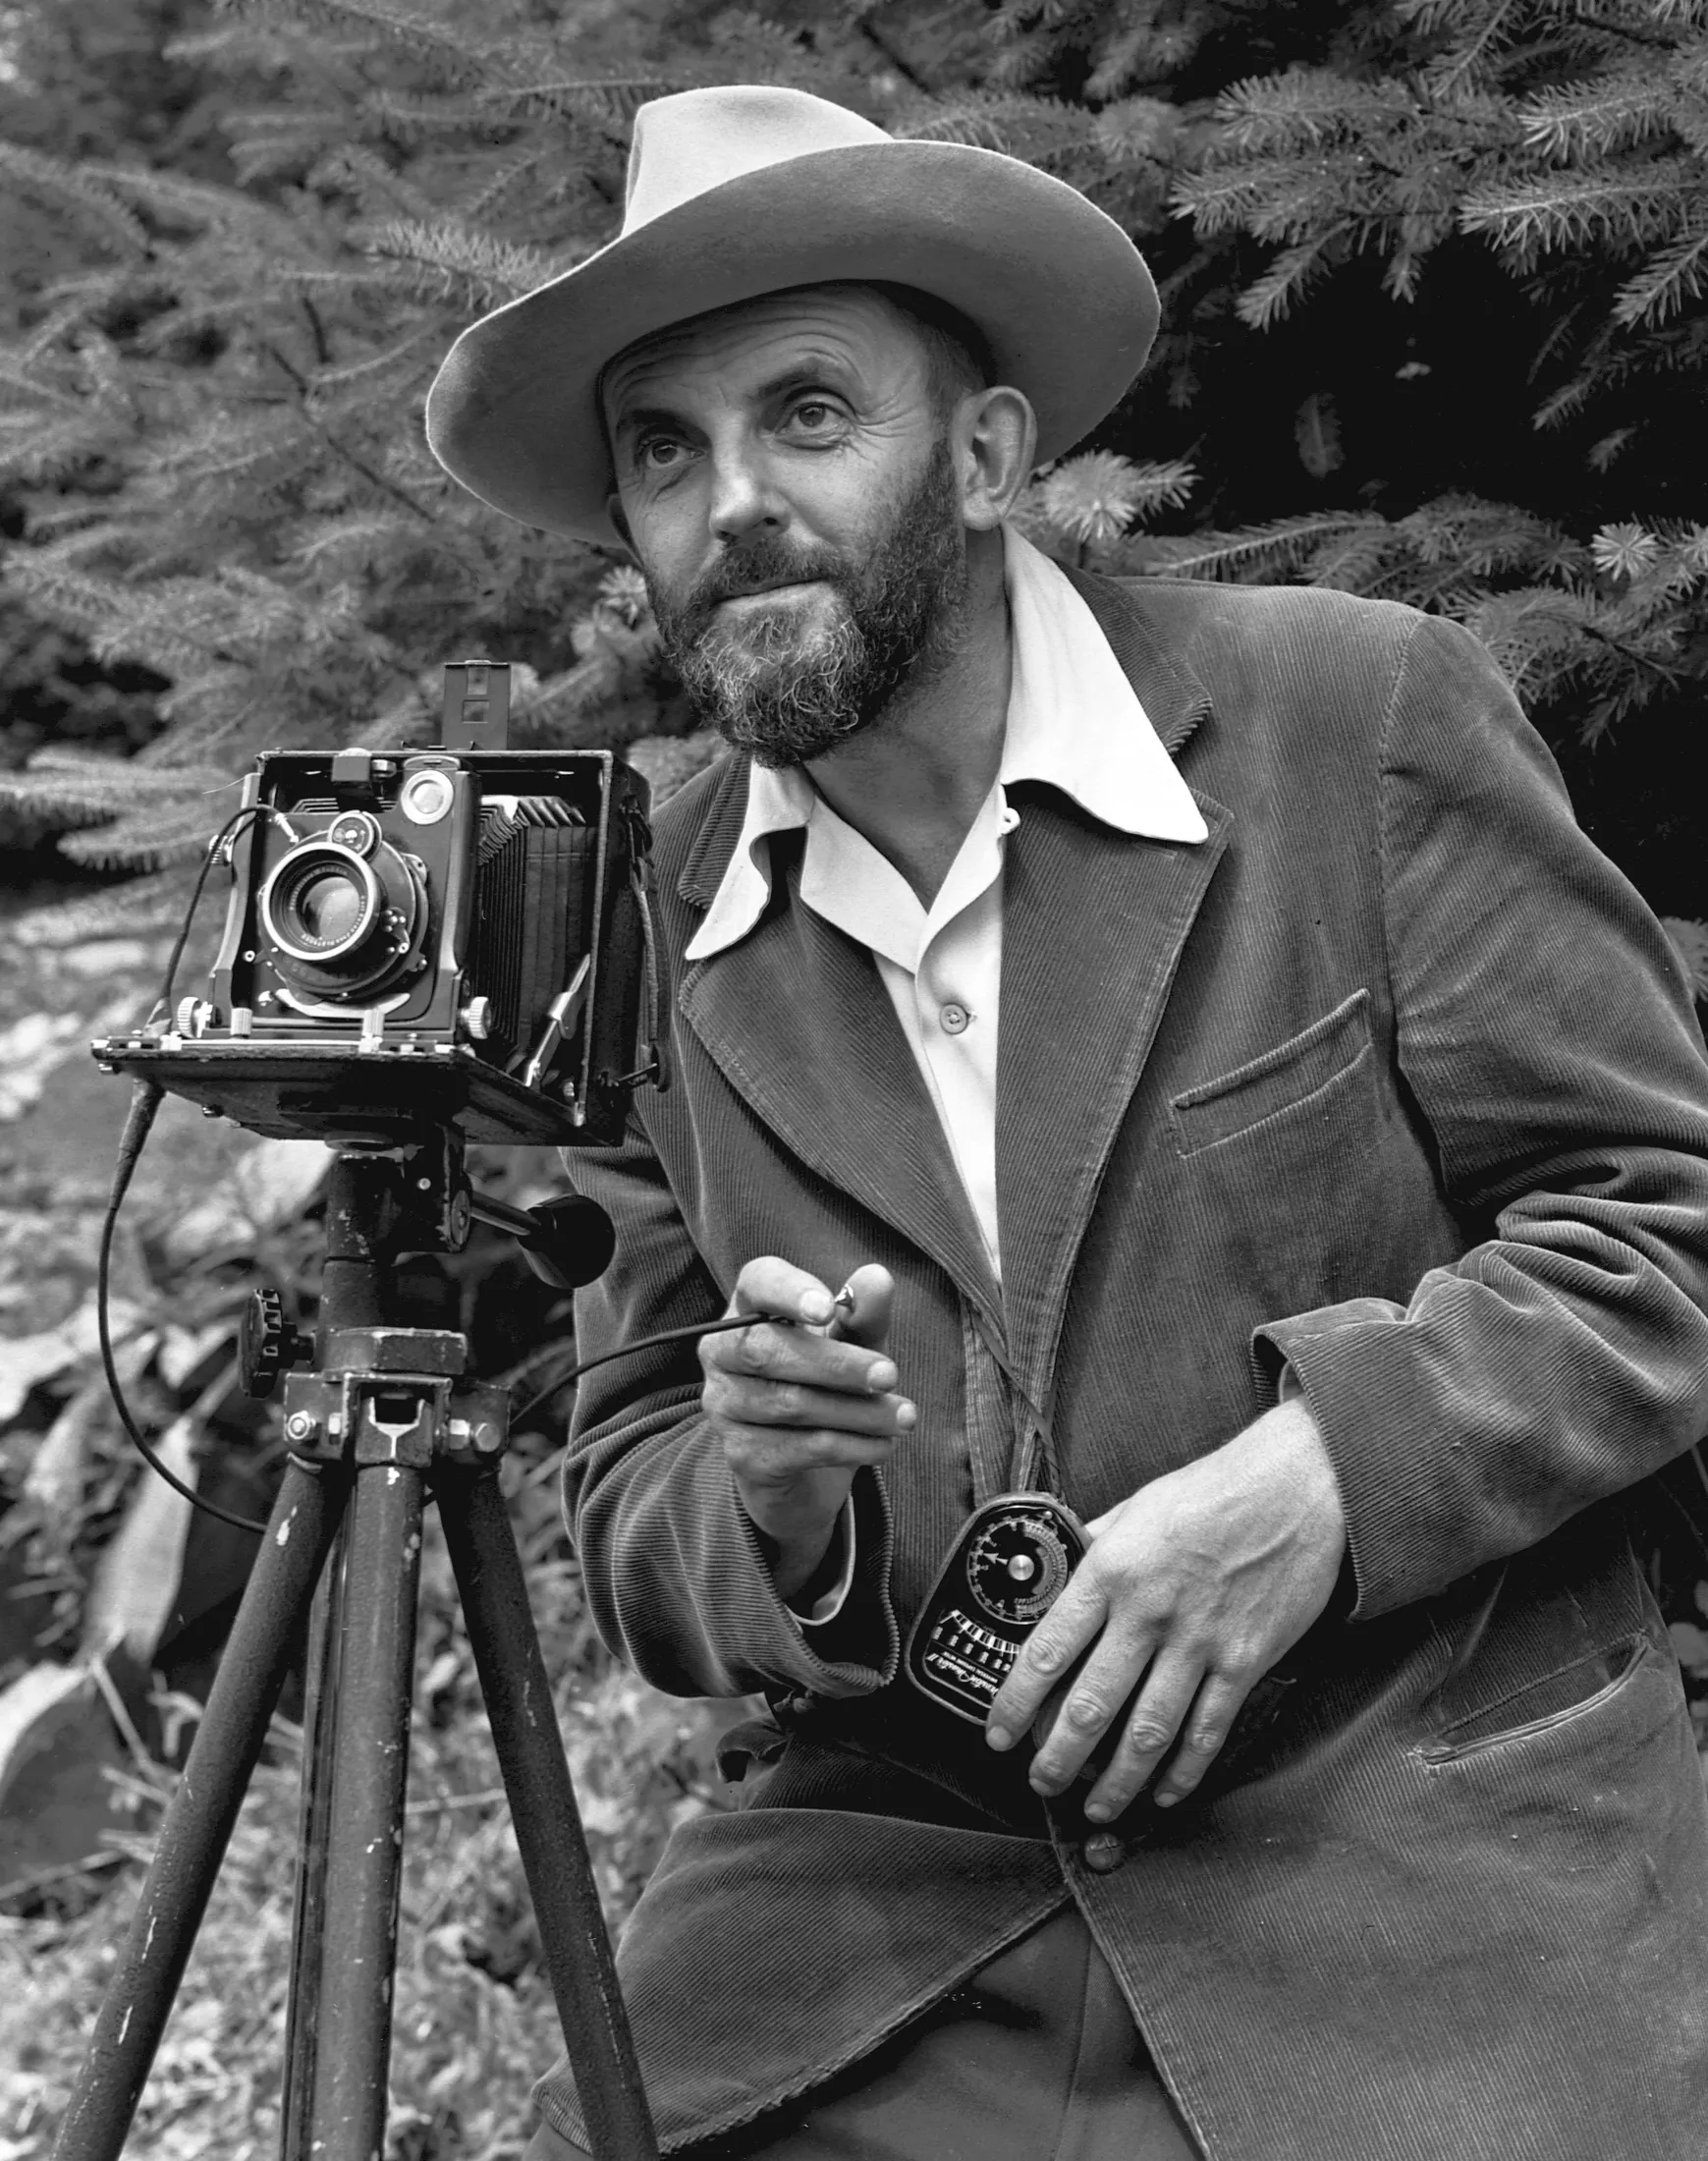
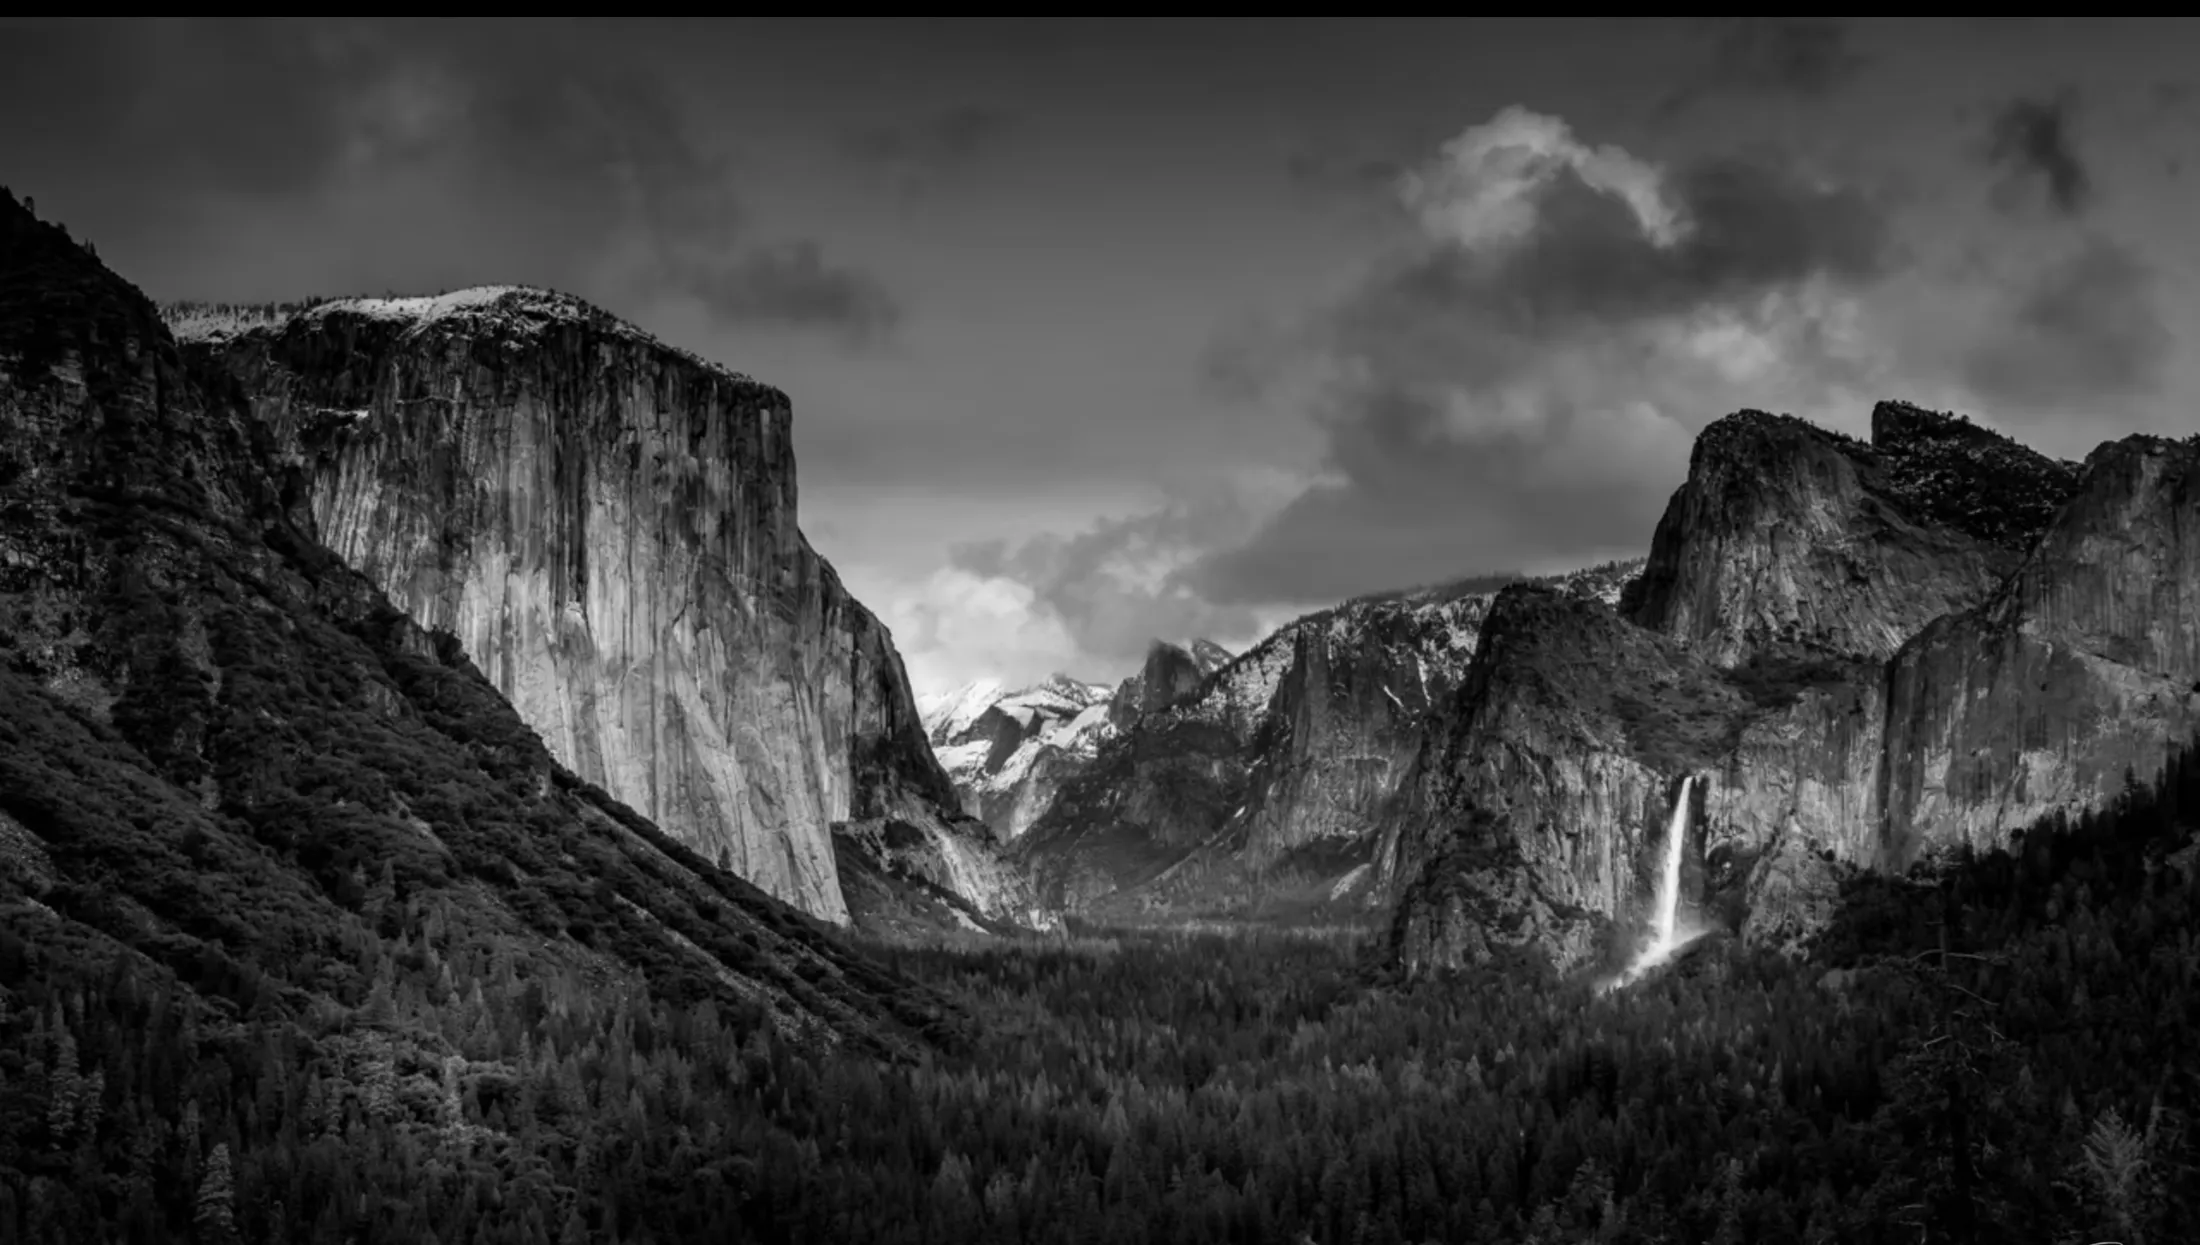
Image by J. Malcolm Greany
Always shoot raw
As a landscape photographer, you have no excuse not to shoot raw. Adams shot the majority of his images on large-format film and this guaranteed maximum clarity and quality. As you’ll likely be shooting digital, you have an obligation to capture the landscape with that same image quality in mind and also ensure you have enough file information to effectively work on your image in post. That means shooting raw.
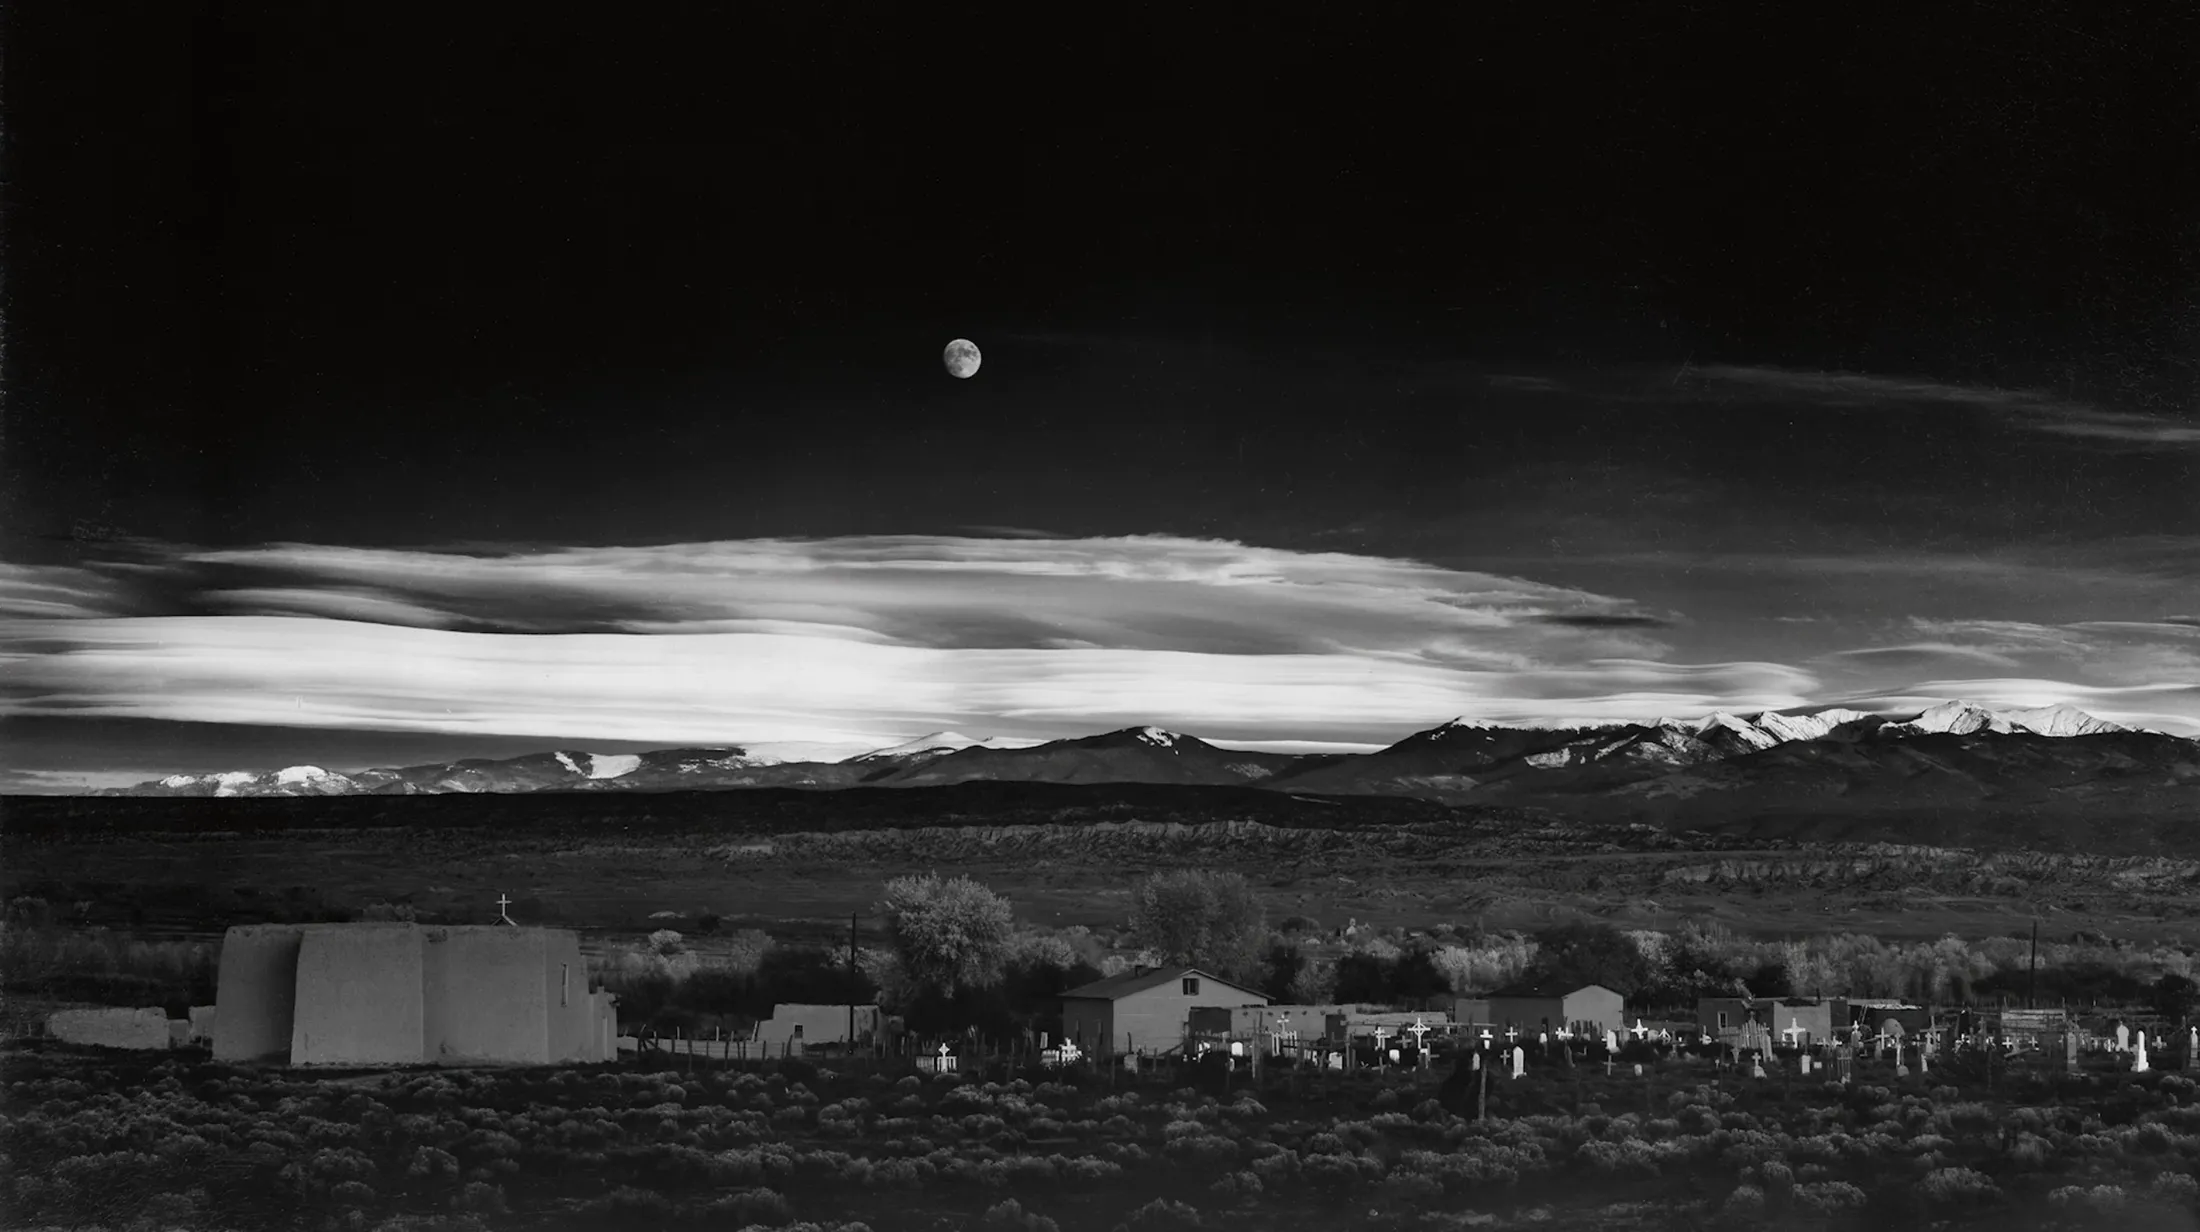
Evening, McDonald Lake, Glacier National Park (1942) © U.S. The National Archives and Records Administration
Don’t be afraid of post-processing
These days we’re often sniffy about photographers who use a lot of post-processing. But look back at the past masters of photographers, including Adams, and you’ll soon see that 50% of their image-making occurred in the darkroom. As Adams himself said, ‘Dodging and burning are steps to take care of mistakes God made in establishing tonal relationships’. Software like Photoshop and Lightroom exist to help realise those shots you saw on location. Don’t be afraid to adjust the brightness, contrast and dodge and burn until the scene was as you saw it. Again, as Adams said, ‘You don’t take a photograph, you make it’.
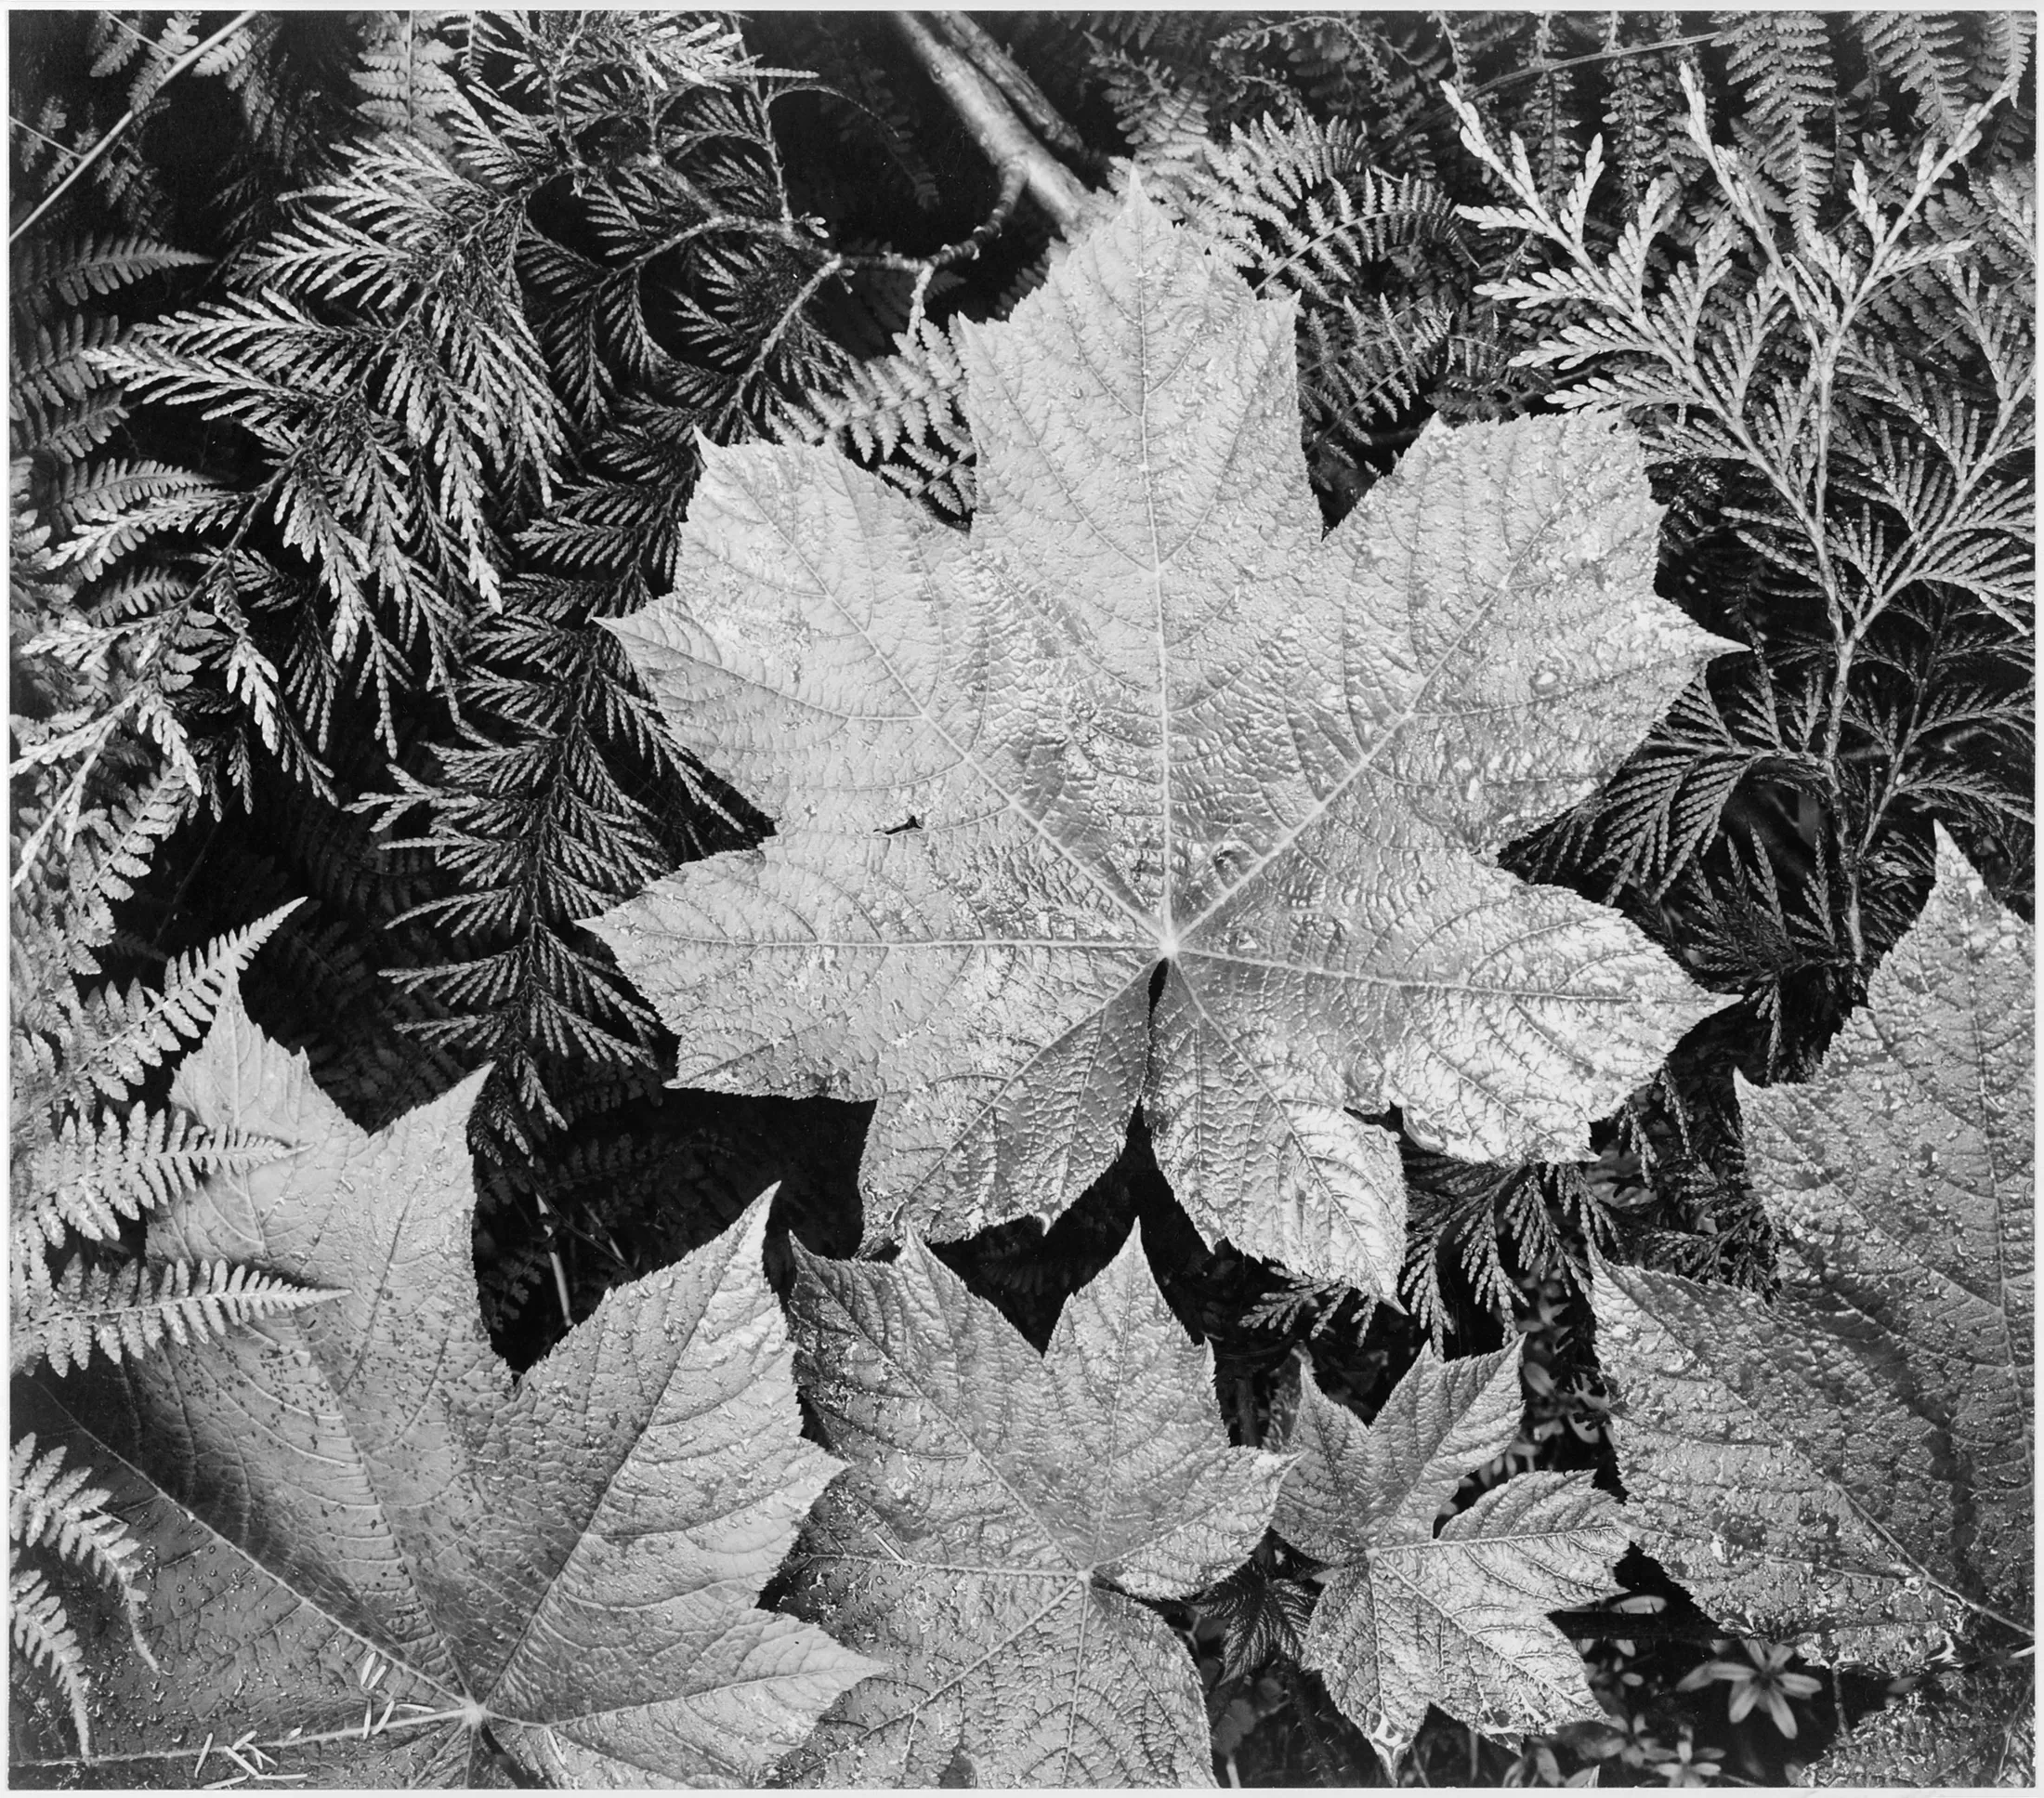
Close-up of leaves In Glacier National Park (1942) © The Ansel Adams Publishing Rights Trust
Try placing your horizon high in the frame
One of the key compositional techniques that Adams employed in many of his images was to place the horizon about two-thirds of the way up the frame. This would mean the composition was biased in favour of the landscape rather than the sky and would help to communicate the epic scale of the scene. This is an incredibly simple technique and one that will give your images visual magnitude.
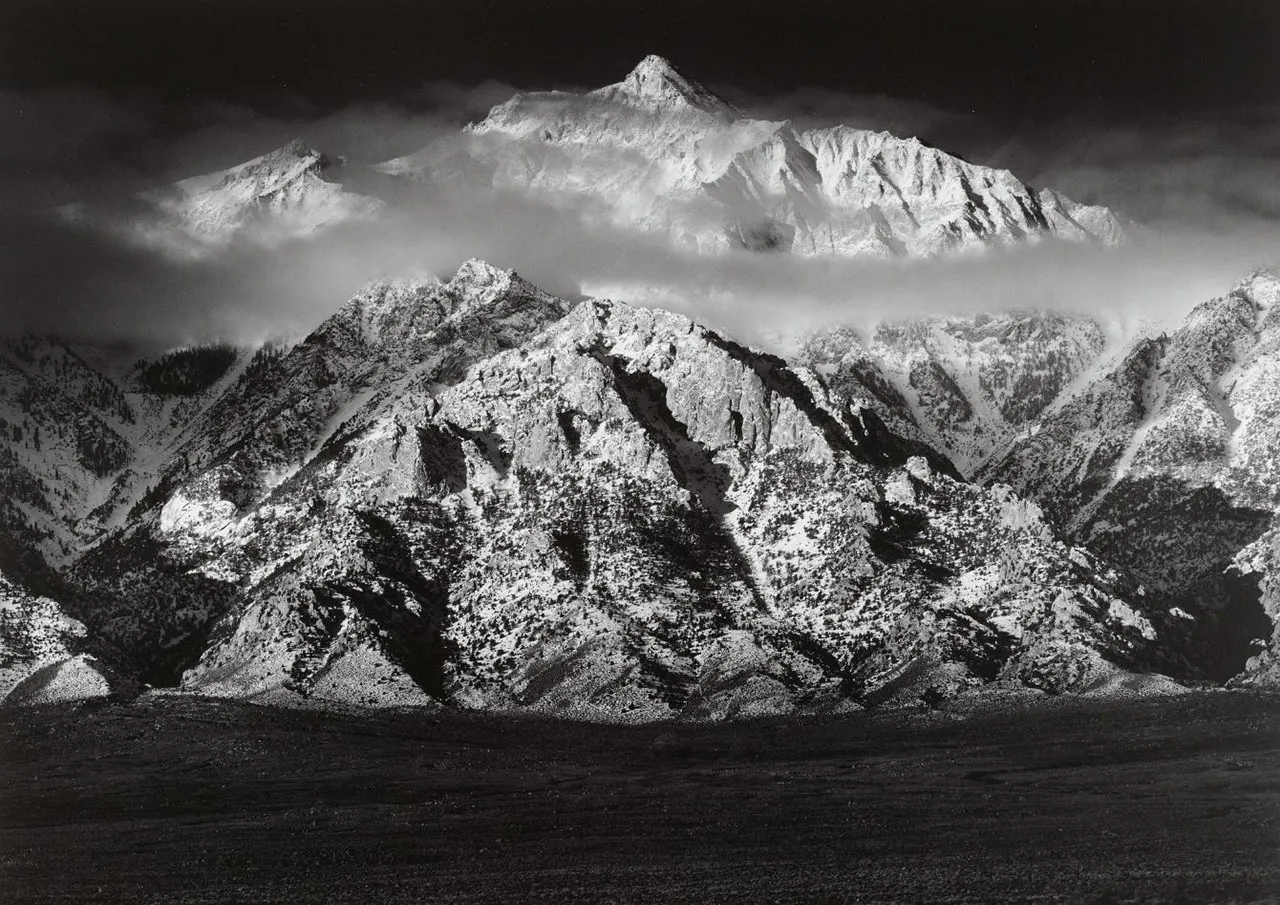
Ansel Adams Mount Williamson Sierra Nevada from the Owens Valley California 1944 © The Ansel Adams Publishing Rights Trust
Don’t get bogged down in ‘rules’
Are you tired of hearing about the rules of composition? So was Ansel Adams. ‘The so-called rules of photographic composition are, in my opinion, invalid, irrelevant, immaterial,’ he said. Rules of composition, such as the rule of thirds and golden ratio, are stale, predictable and boring. While they can certainly serve to create visually pleasing images, they can also stand to get in the way of creativity. Take a chance and throw them out the window. You may surprise yourself.
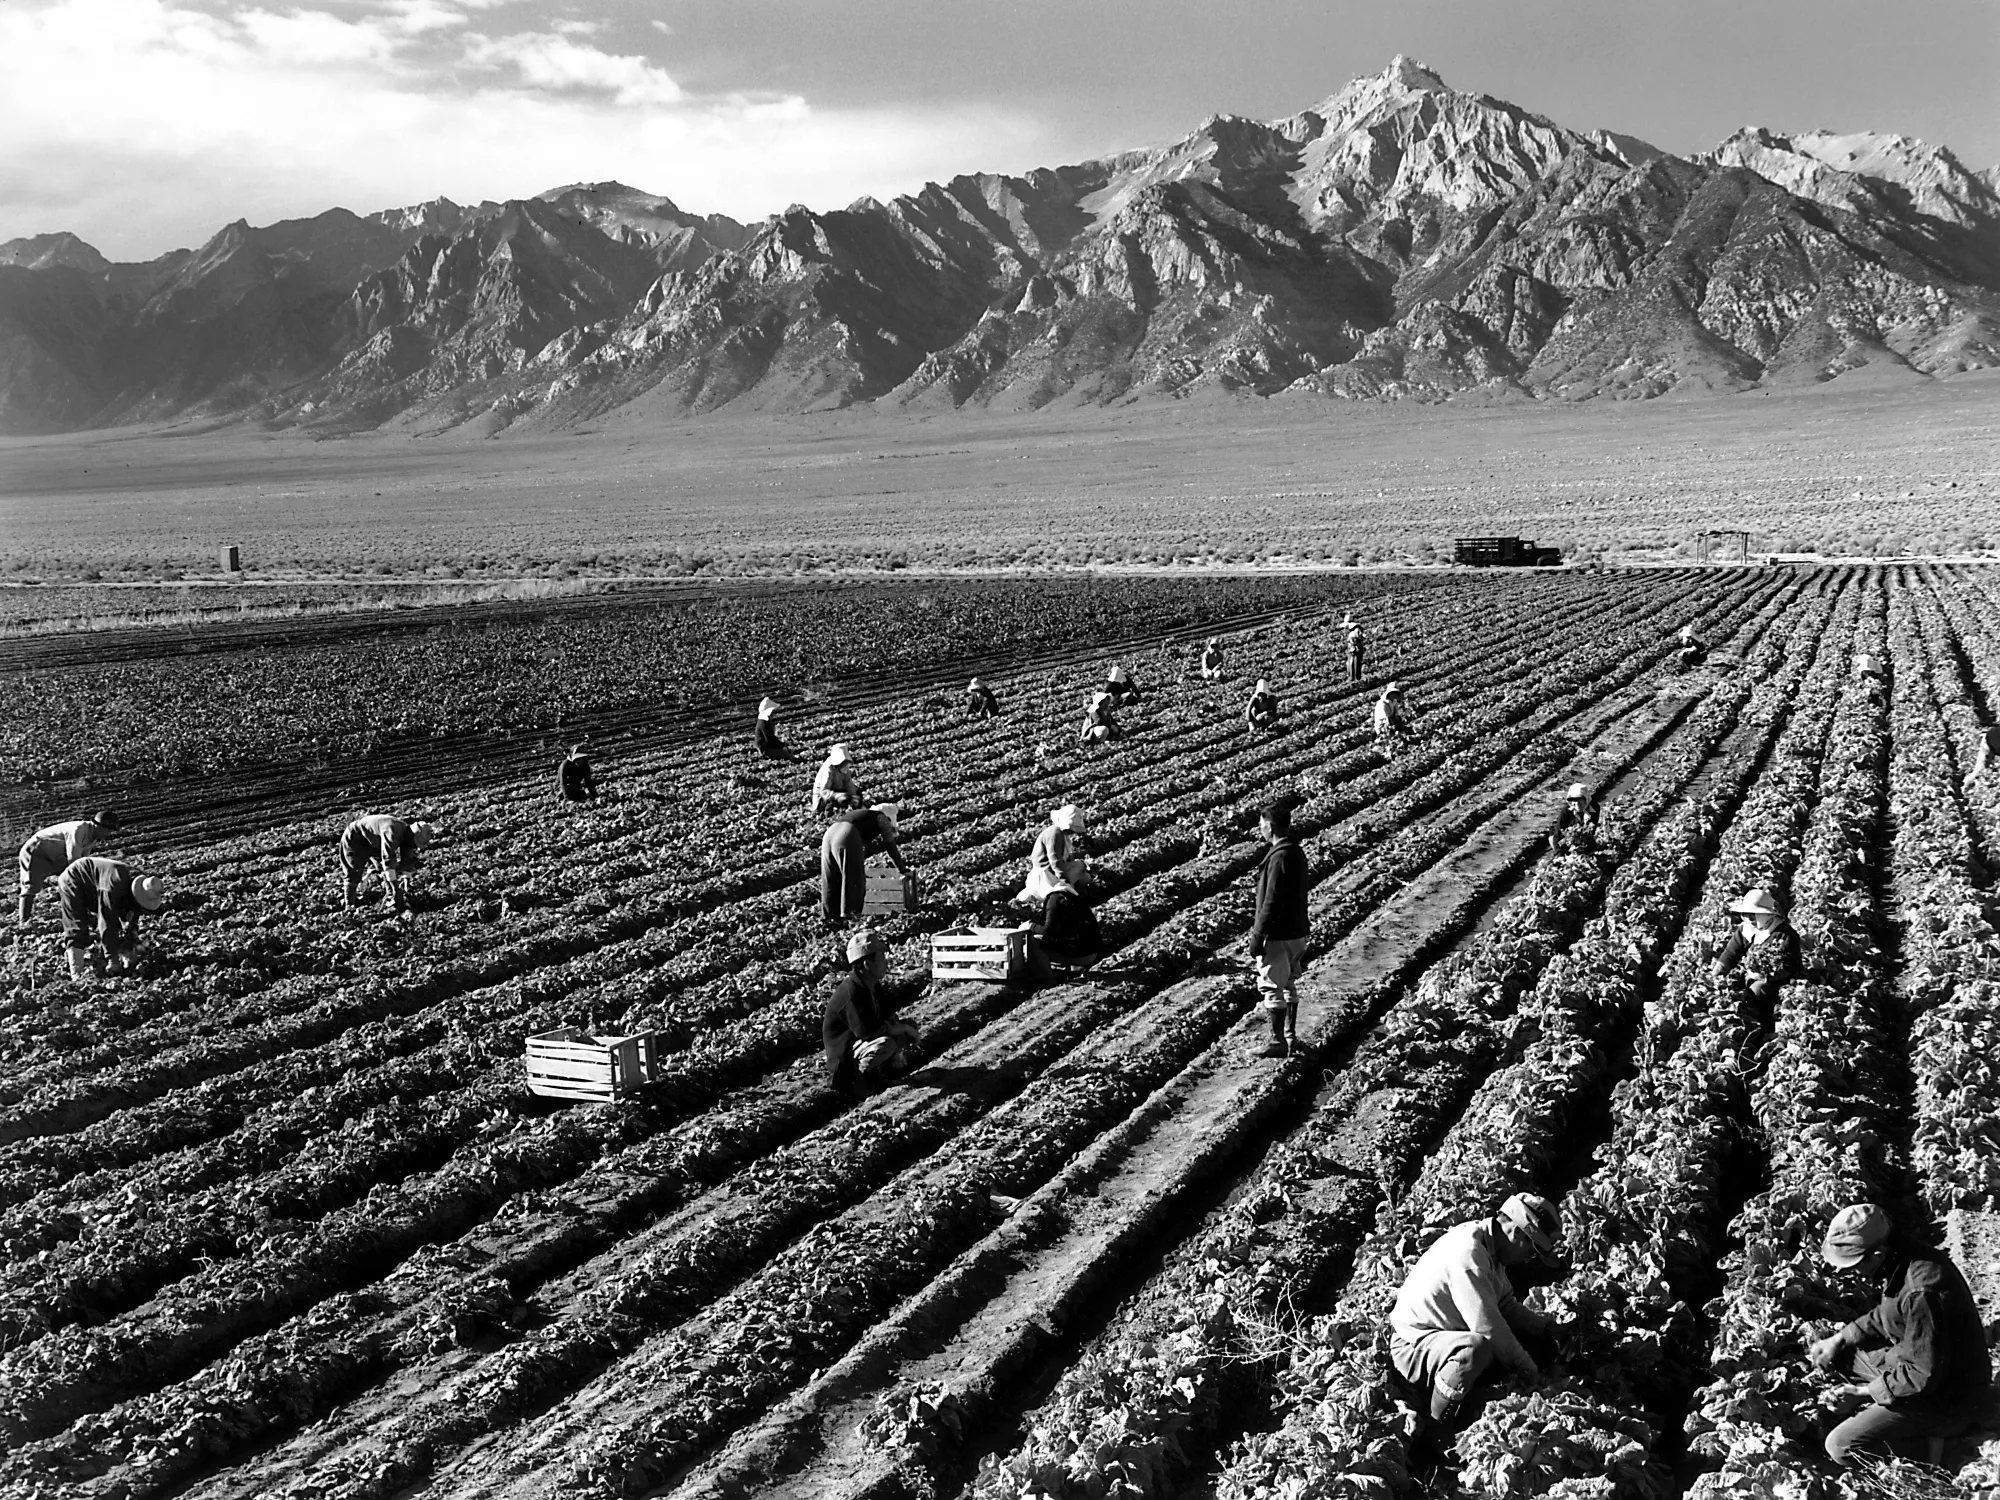
Farm, farm workers, Mt. Williamson in background, Manzanar Relocation Center, California 1943 © The Ansel Adams Publishing Rights Trust
