Technique Feature
A Quick Guide to Coastal Pictures
with Phil Green
Changing light and weather means no two coastal images are ever the same. Beach and coast photographer Phil Green shows how to best capture these diverse landscapes
There’s nothing more evocative than a landscape photograph taken on the coast. The power of the waves and the patterns of the backwash can lead to excellent images. Beach and coastal locations are an ever-shifting terrain in terms of tide and weather, and that means no two photos taken in the same location will ever be the same. While planning before visiting these locations is important, as we’ll see, you never truly know what the conditions will be and that makes every visit an exciting event. Photocrowd photographer, Phil Green, who lives in Bridlington in the UK, shows how you can make the most of your trips to the beach.

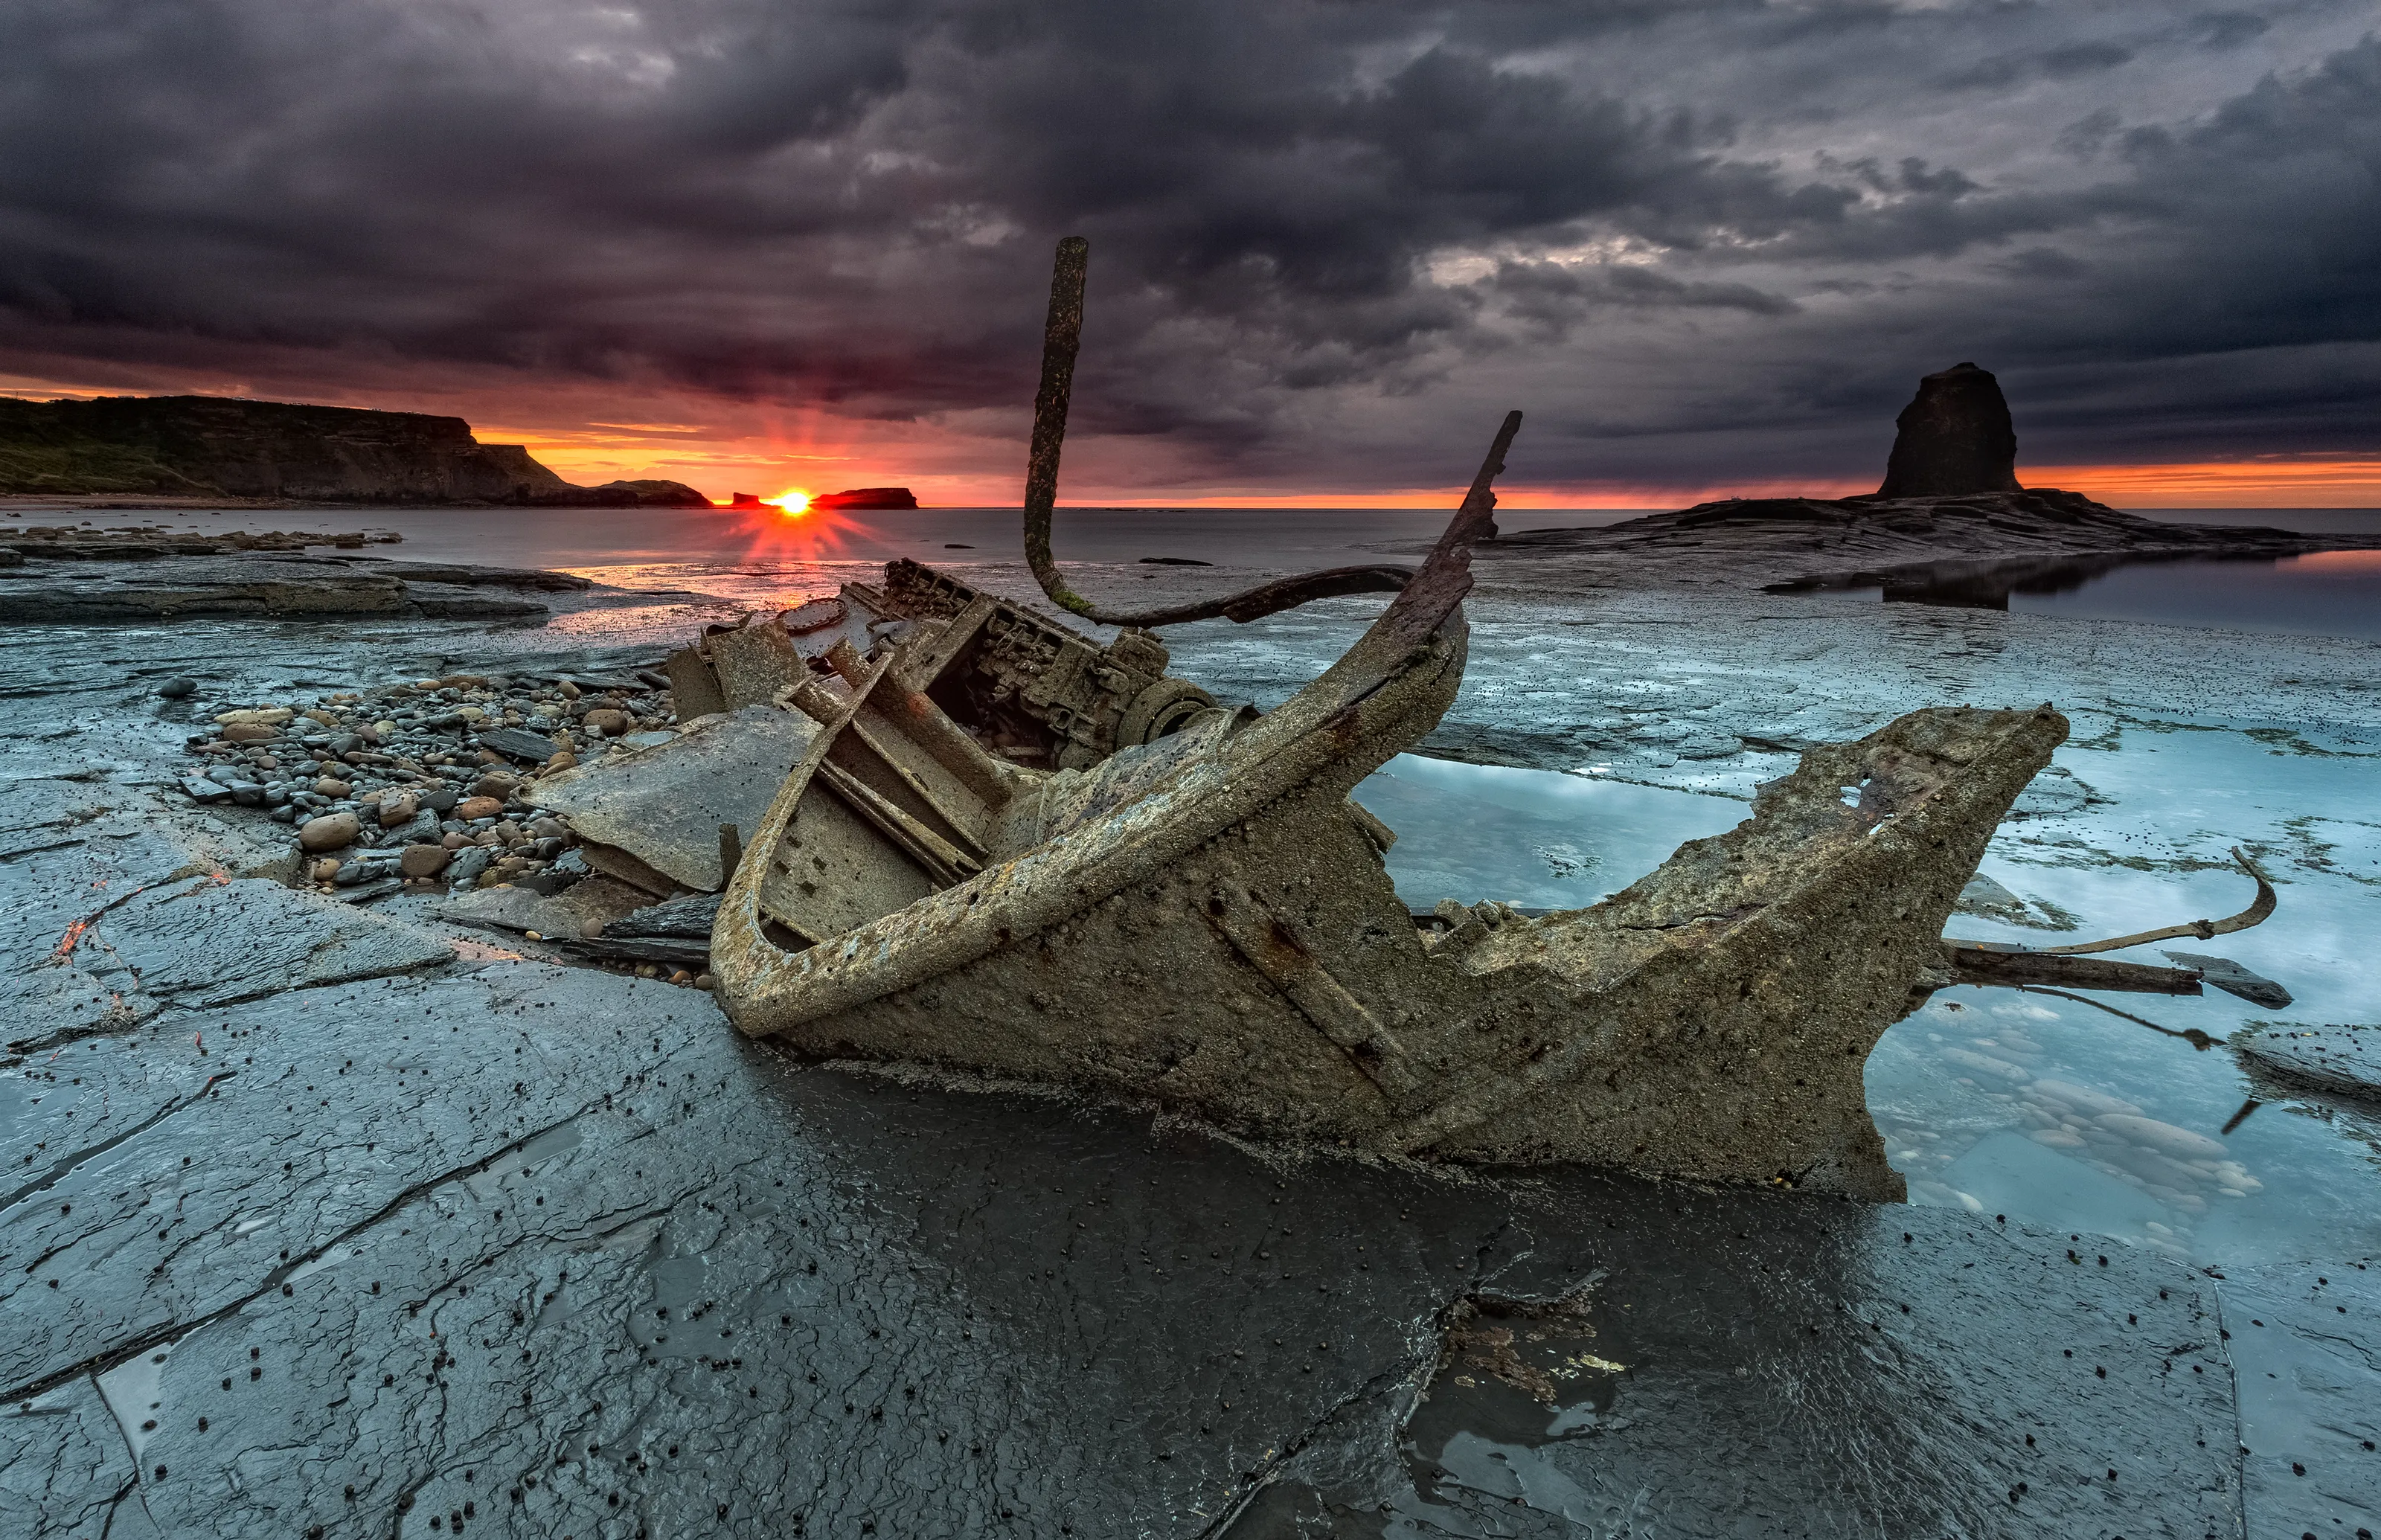
‘Old Fishing Boat’
1. Check the conditions before you go
Before going out, check the tide times. Certain places will look better at high tide and some are better at low tide. Also check the weather forecast and sunrise time and then use The Photographer’s Ephemeris to see where the sun is going to rise in relation to you chosen location. Phil also recommends consulting Magic Seaweed, which predicts wave height and swell length.

‘Breil Newk’

2. Get to your location early
The best time to visit your chosen location is just before sunrise, particularly during the months of June, July and August. As the sun rises, the sky will be a painter’s pallet of orange, yellow and blue.
‘There’s nothing better than getting up in the early hours and heading off to some remote beach or clifftop,’ says Phil. ‘Often, you’ll be the only person there, alone with your thoughts. Then the creative juices can flow.’
Phil recommends buying a headtorch as you’ll be walking on footpaths in the dark before sunrise. Getting there early will also allow you to soak in the atmosphere before setting up your gear. Then you can determine early on if the conditions will be conducive to a good image.

‘Saltwick Bay Sunset’
3. Take some time to analyse the scene
There are several elements that Phil look for when he arrives. The first is the condition of the sky.
‘I look to the sky for the first hint of colour,’ says Phil. ‘I also need to see if the sky is clear or if there’s a decent amount of cloud cover, which I prefer, though it’s often a case of making the best from what nature has to offer.’
When composing an image, Phil is particularly interested in including some foreground interest (in the shot below, for example) whether it is patterns in the sand or sea or a nice set of breakwaters.
‘If I’m on a beach or if I’m on the cliffs, I’m also noticing how the light interacts with the land or sea while watching the sky and moving around to capture it at its best. The only conditions I can’t stand is when the sky is a flat blanket of pale grey. In these conditions, I won’t even get the camera out. I don’t mind it being dull as long as it’s a dirty stormy sky with good cloud definition.’

‘Dawn Light’
4. Visit your location more than once
Revisit your location more than once so you can study and note the changes in light and sea state. A place can look completely different if one day the sea is still and the next there are decent waves. It will look even more distinct when one day there is a clear sky and the next it is bruised and marbled.

‘Retreating Tide’
5. Try a variety of shutter speeds
Experiment with varying shutter speeds, as shorter and longer speeds will each bring something unique to a location. Great tumbling waves can benefit from either being frozen using a fast shutter (around half a second) or can look great with a faster shutter as it will give your image a feeling of kinetic momentum (up to four seconds). If the sea is relatively still, however, Phil will experiment with speeds ranging from thirty seconds to four minutes (using his camera’s bulb mode) as this will give the ocean a glassy veneer.

‘Blue Day’
6. Keep your aperture and ISO simple
As Phil is primarily concerned with his shutter speeds, he’ll tend to keep his aperture at f/16, which will keep everything sharp and in focus, and his ISO at 100.

‘After the Storm’
7. Seal your viewfinder for longer exposures
It’s a little-known fact that long exposure photography can very occasionally be ruined by light leaks. Today’s cameras bodies are precisely manufactured to prevent this, meaning the leak is occurring from an unexpected source – the viewfinder. To prevent this, place the rubber eyepiece cover over your viewfinder. Your camera should have come with one out of the box. If you’ve lost yours – as most of us have – use an alternative plug. But make sure the material is smooth and soft and won’t scratch your viewfinder’s glass.

‘Hornsea Beach’
8. Use live view to compose your shots
Phil swears by the benefits of his camera’s live view function. Check your camera’s manual to see how to access this. Live view allows you to use your camera’s screen to see your shot in real time, rather than looking through the viewfinder. Use live view to compose your shot, check the light and zoom in to ensure all the areas you want in focus are sharp.

‘Water Trails’
9. Invest in some filters to assist with exposures
While Phil possesses a number of filters, he mostly uses hard grads and the Lee Little Stopper to help achieve his long-exposure coastal images
‘The sky is the brightest part of an image and most of my seascapes have a flat horizon,’ says Phil. ‘By applying a hard grad with the dark part of the filter sitting flush with the horizon, it reduces the exposure for the sky. That also means I can get more foreground detail. Additionally, if I have a 2sec exposure and apply the little stopper, I can achieve a shutter speed of up to 128secs.’

‘Tranquility’
10. Purchase some vital accessories
There are a few items that can help make Phil’s life easier when he’s out on location.
• A Manfrotto Junior Geared Tripod Head, an accessory that makes it much easier to finetune the composition.
• A cable release as he’s working with often lengthy shutter speeds and can’t risk camera shake in his images.
• A hot shoe spirit level which makes it easy to ensure the horizon is level.
• A selection of lens and filter cleaning items to wipe away and sand and spray

‘Sun, Sea and Sand’
